Delta X S Frame Assembly Guide
Introduction
This guide provides detailed instructions on how to assemble a frame. You will be guided through each step to ensure a successful frame assembly process.
Requirements
Before getting started, make sure you have the following tools and materials:
- Frame components (including individual parts as listed below)
- Hexagon Tool & other assembly accessories

Step 1: Preparation
1.1. Review the manufacturer’s assembly manual to understand the specific steps. 1.2. Arrange and inspect the frame parts to ensure nothing is missing or damaged. 1.3. Ensure you have all the necessary tools and materials ready for assembly.
Step 2: Frame Assembly
Place the frame on a suitable work surface. Use assembly tools to connect the frame components in the appropriate order. Follow these steps:
2.1 Installing the Corner Brackets
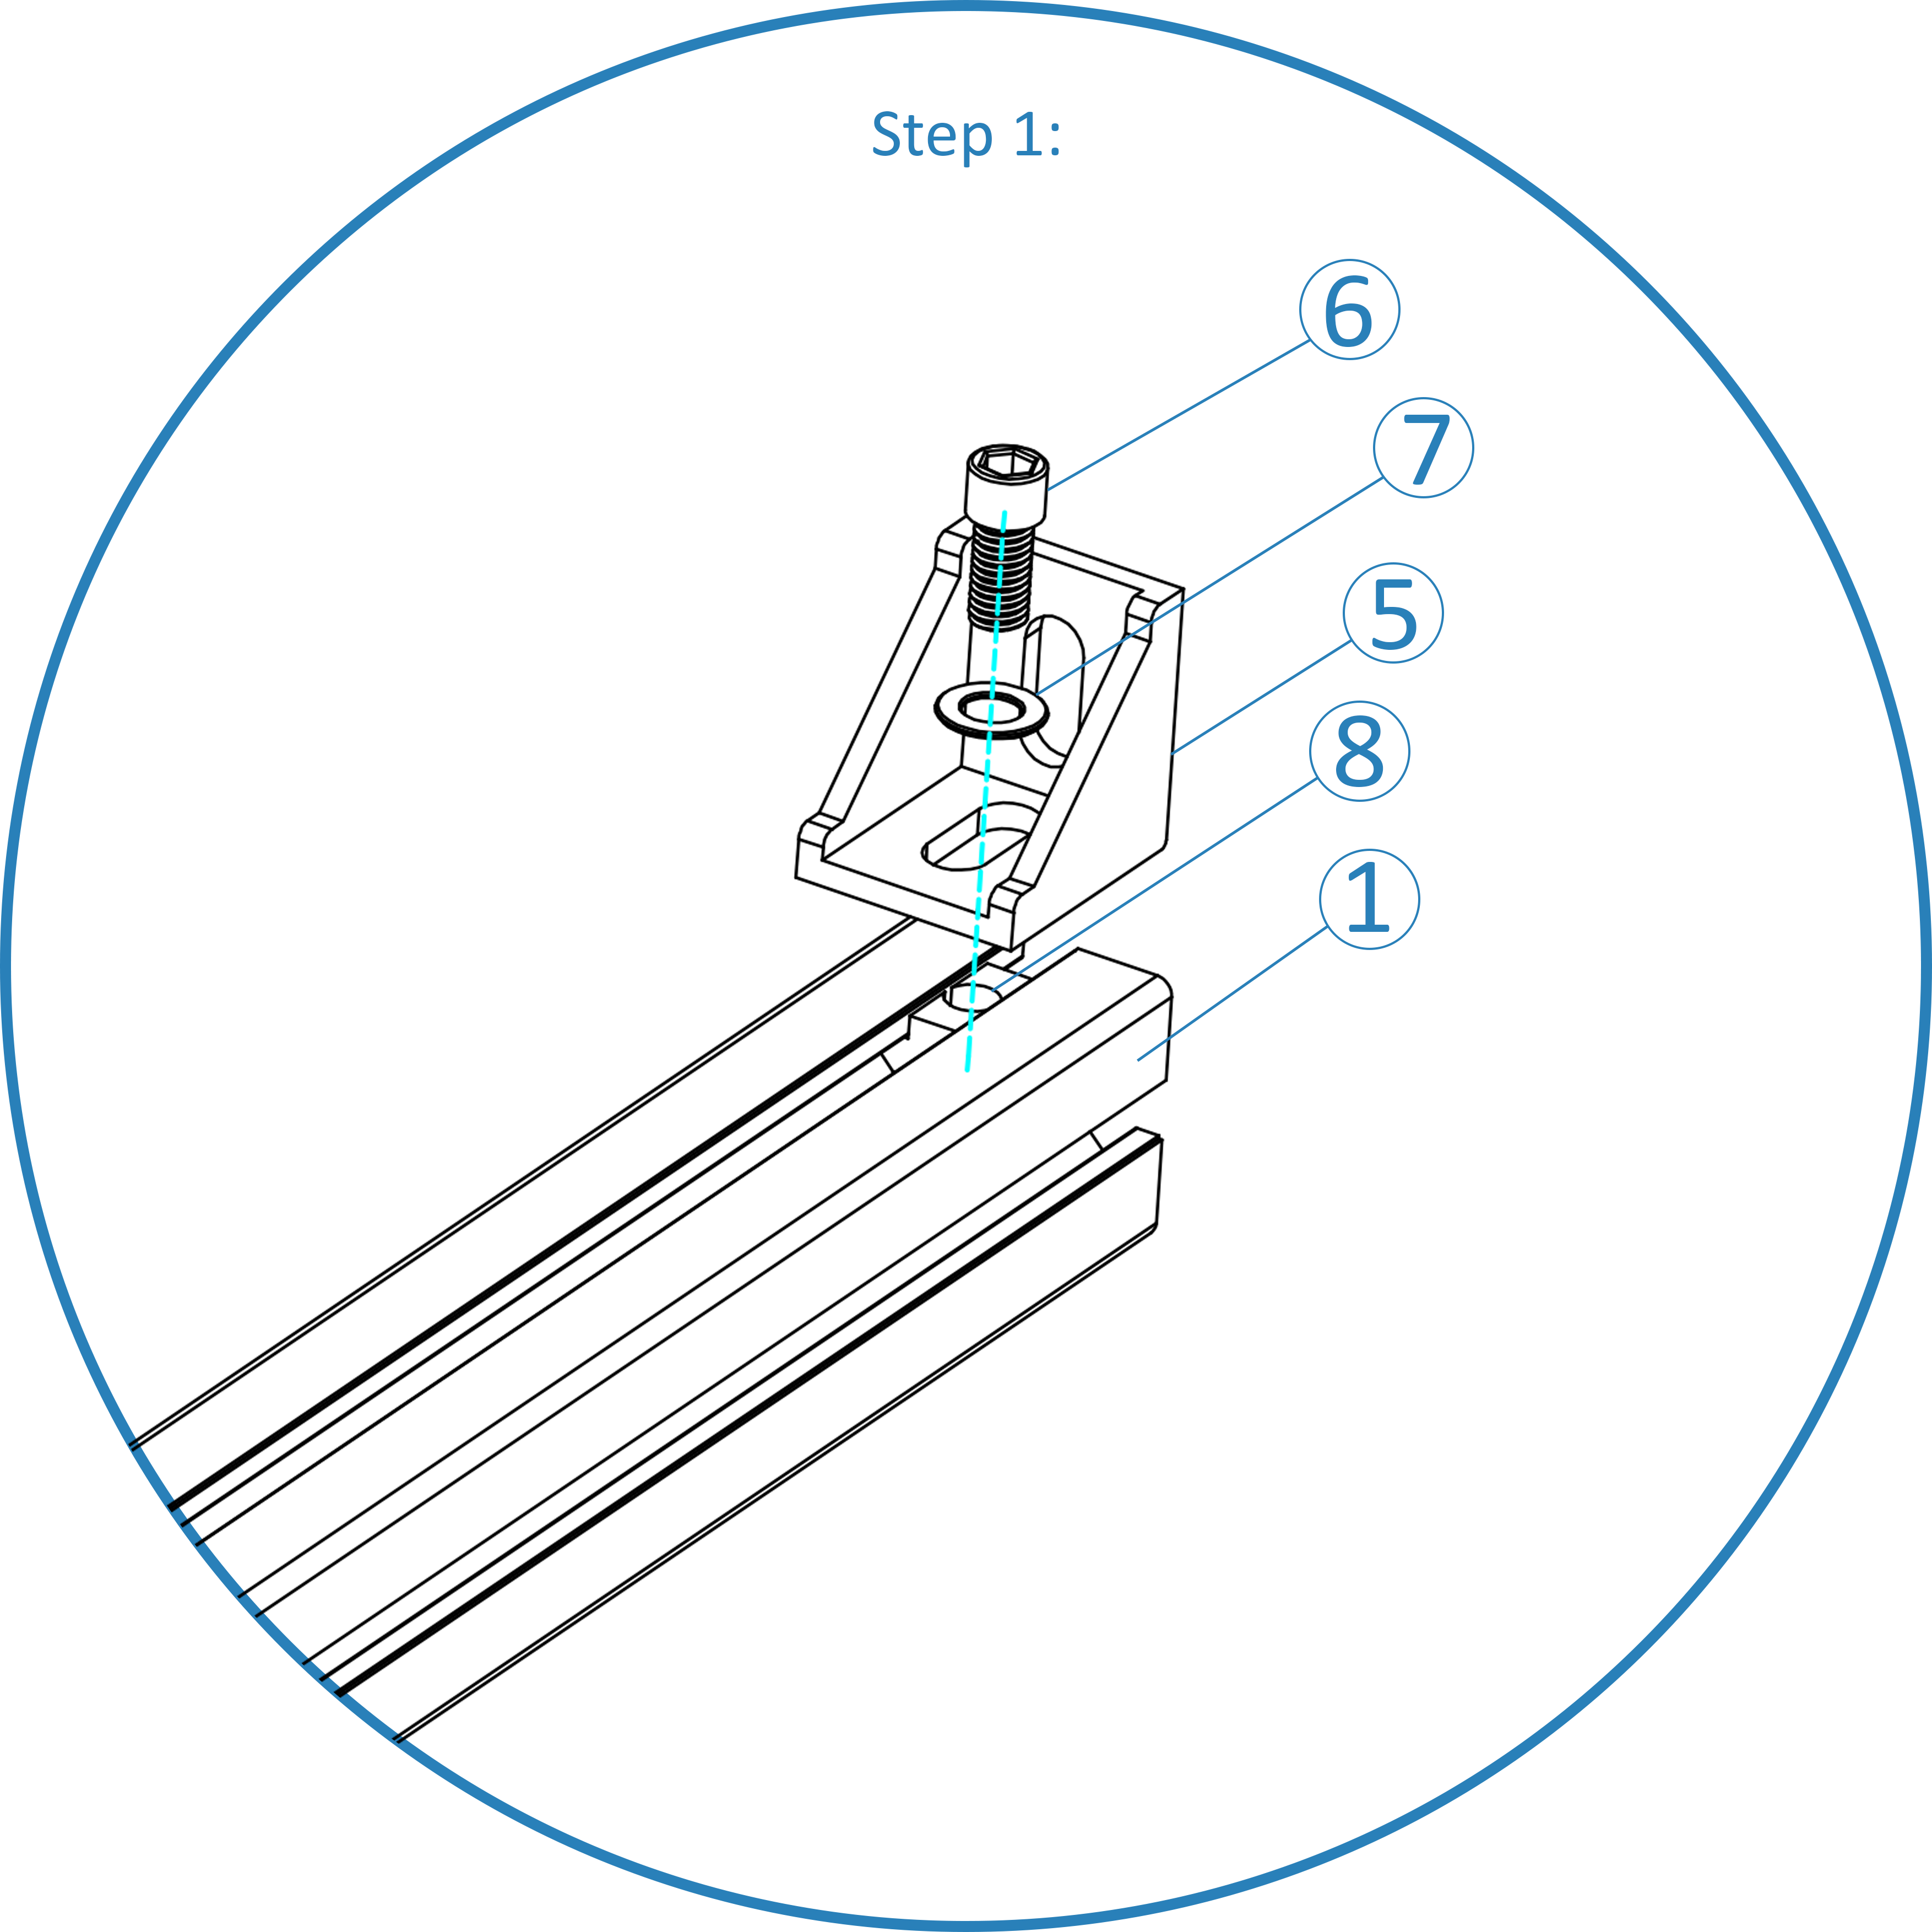
Install M8 T-nut(8) first, then place the 4040 corner bracket (5) onto the aluminum profile (1), ensuring a proper fit and alignment. Then use a hex wrench to secure the corner bracket to the aluminum profile. Tighten the screws to firmly attach the corner bracket to the beam.
NOTE: Use M8x15mm Bolts(6) and DON’T forget to install M8 Washer(7) in every joints.
2.2. Install the rectangular frame below
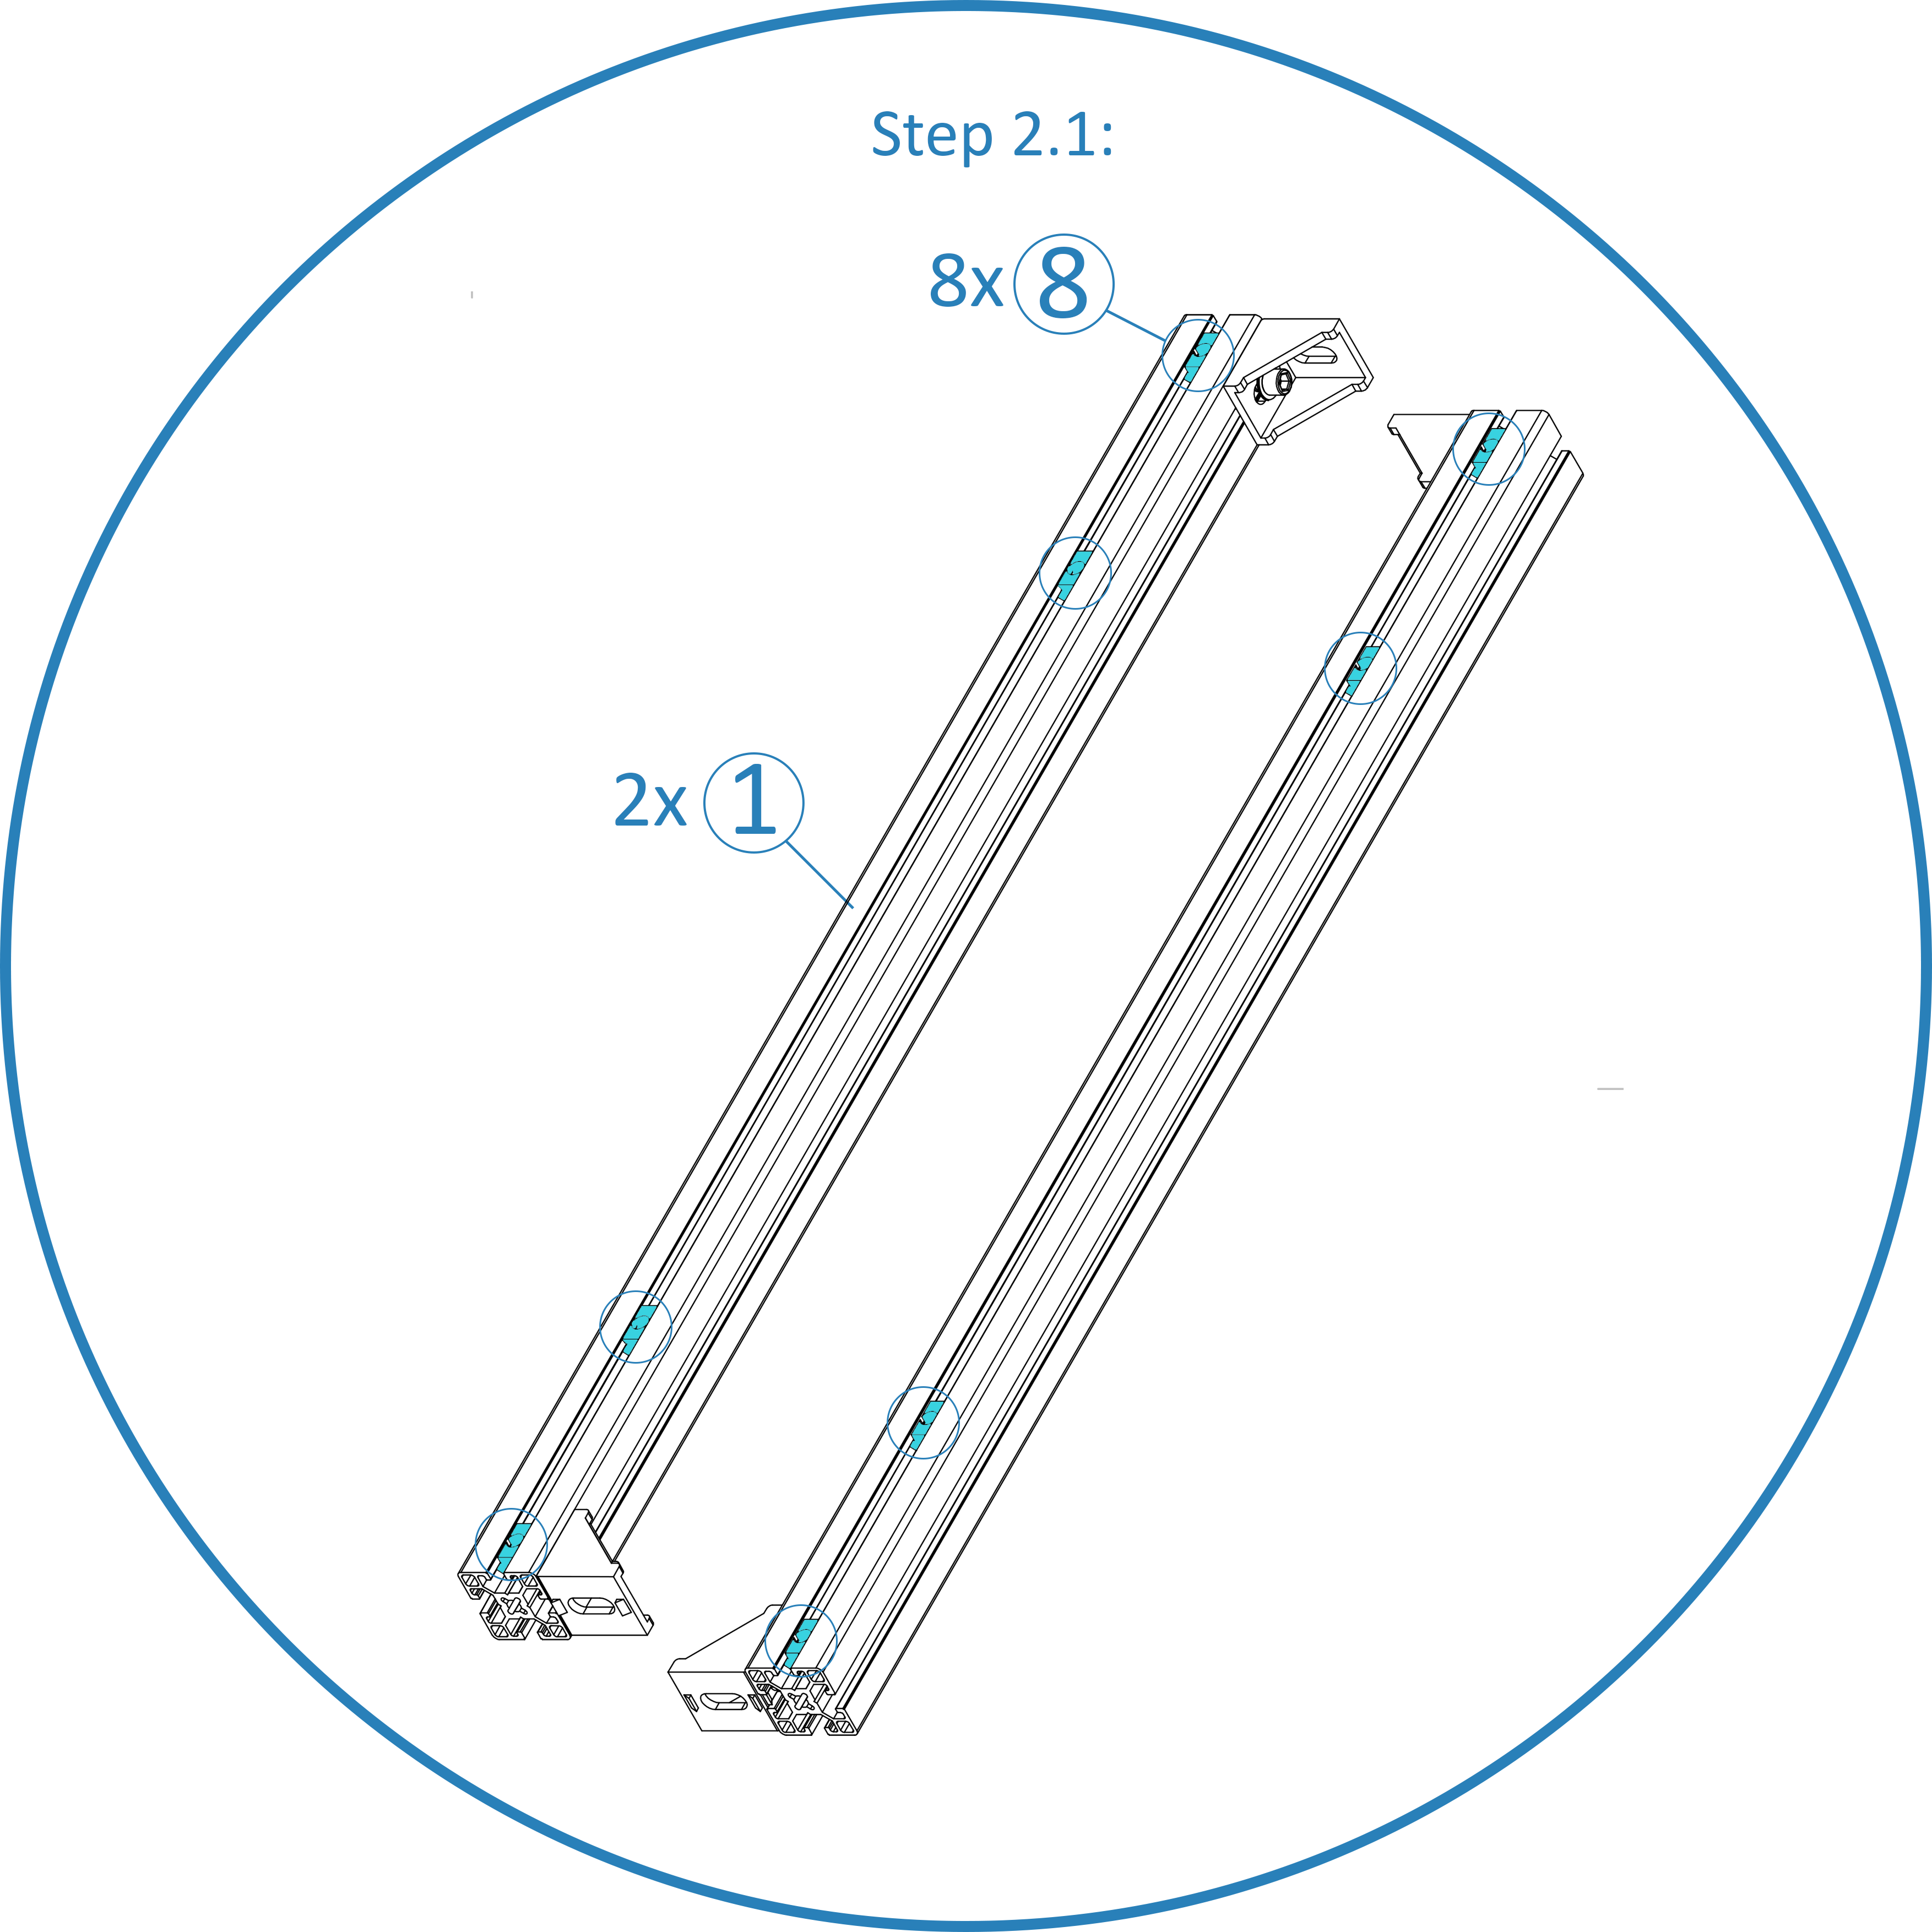
Prepare the two edges of the rectangular frame as follows, DON’T forget to insert 8x M8 T-nut(8).
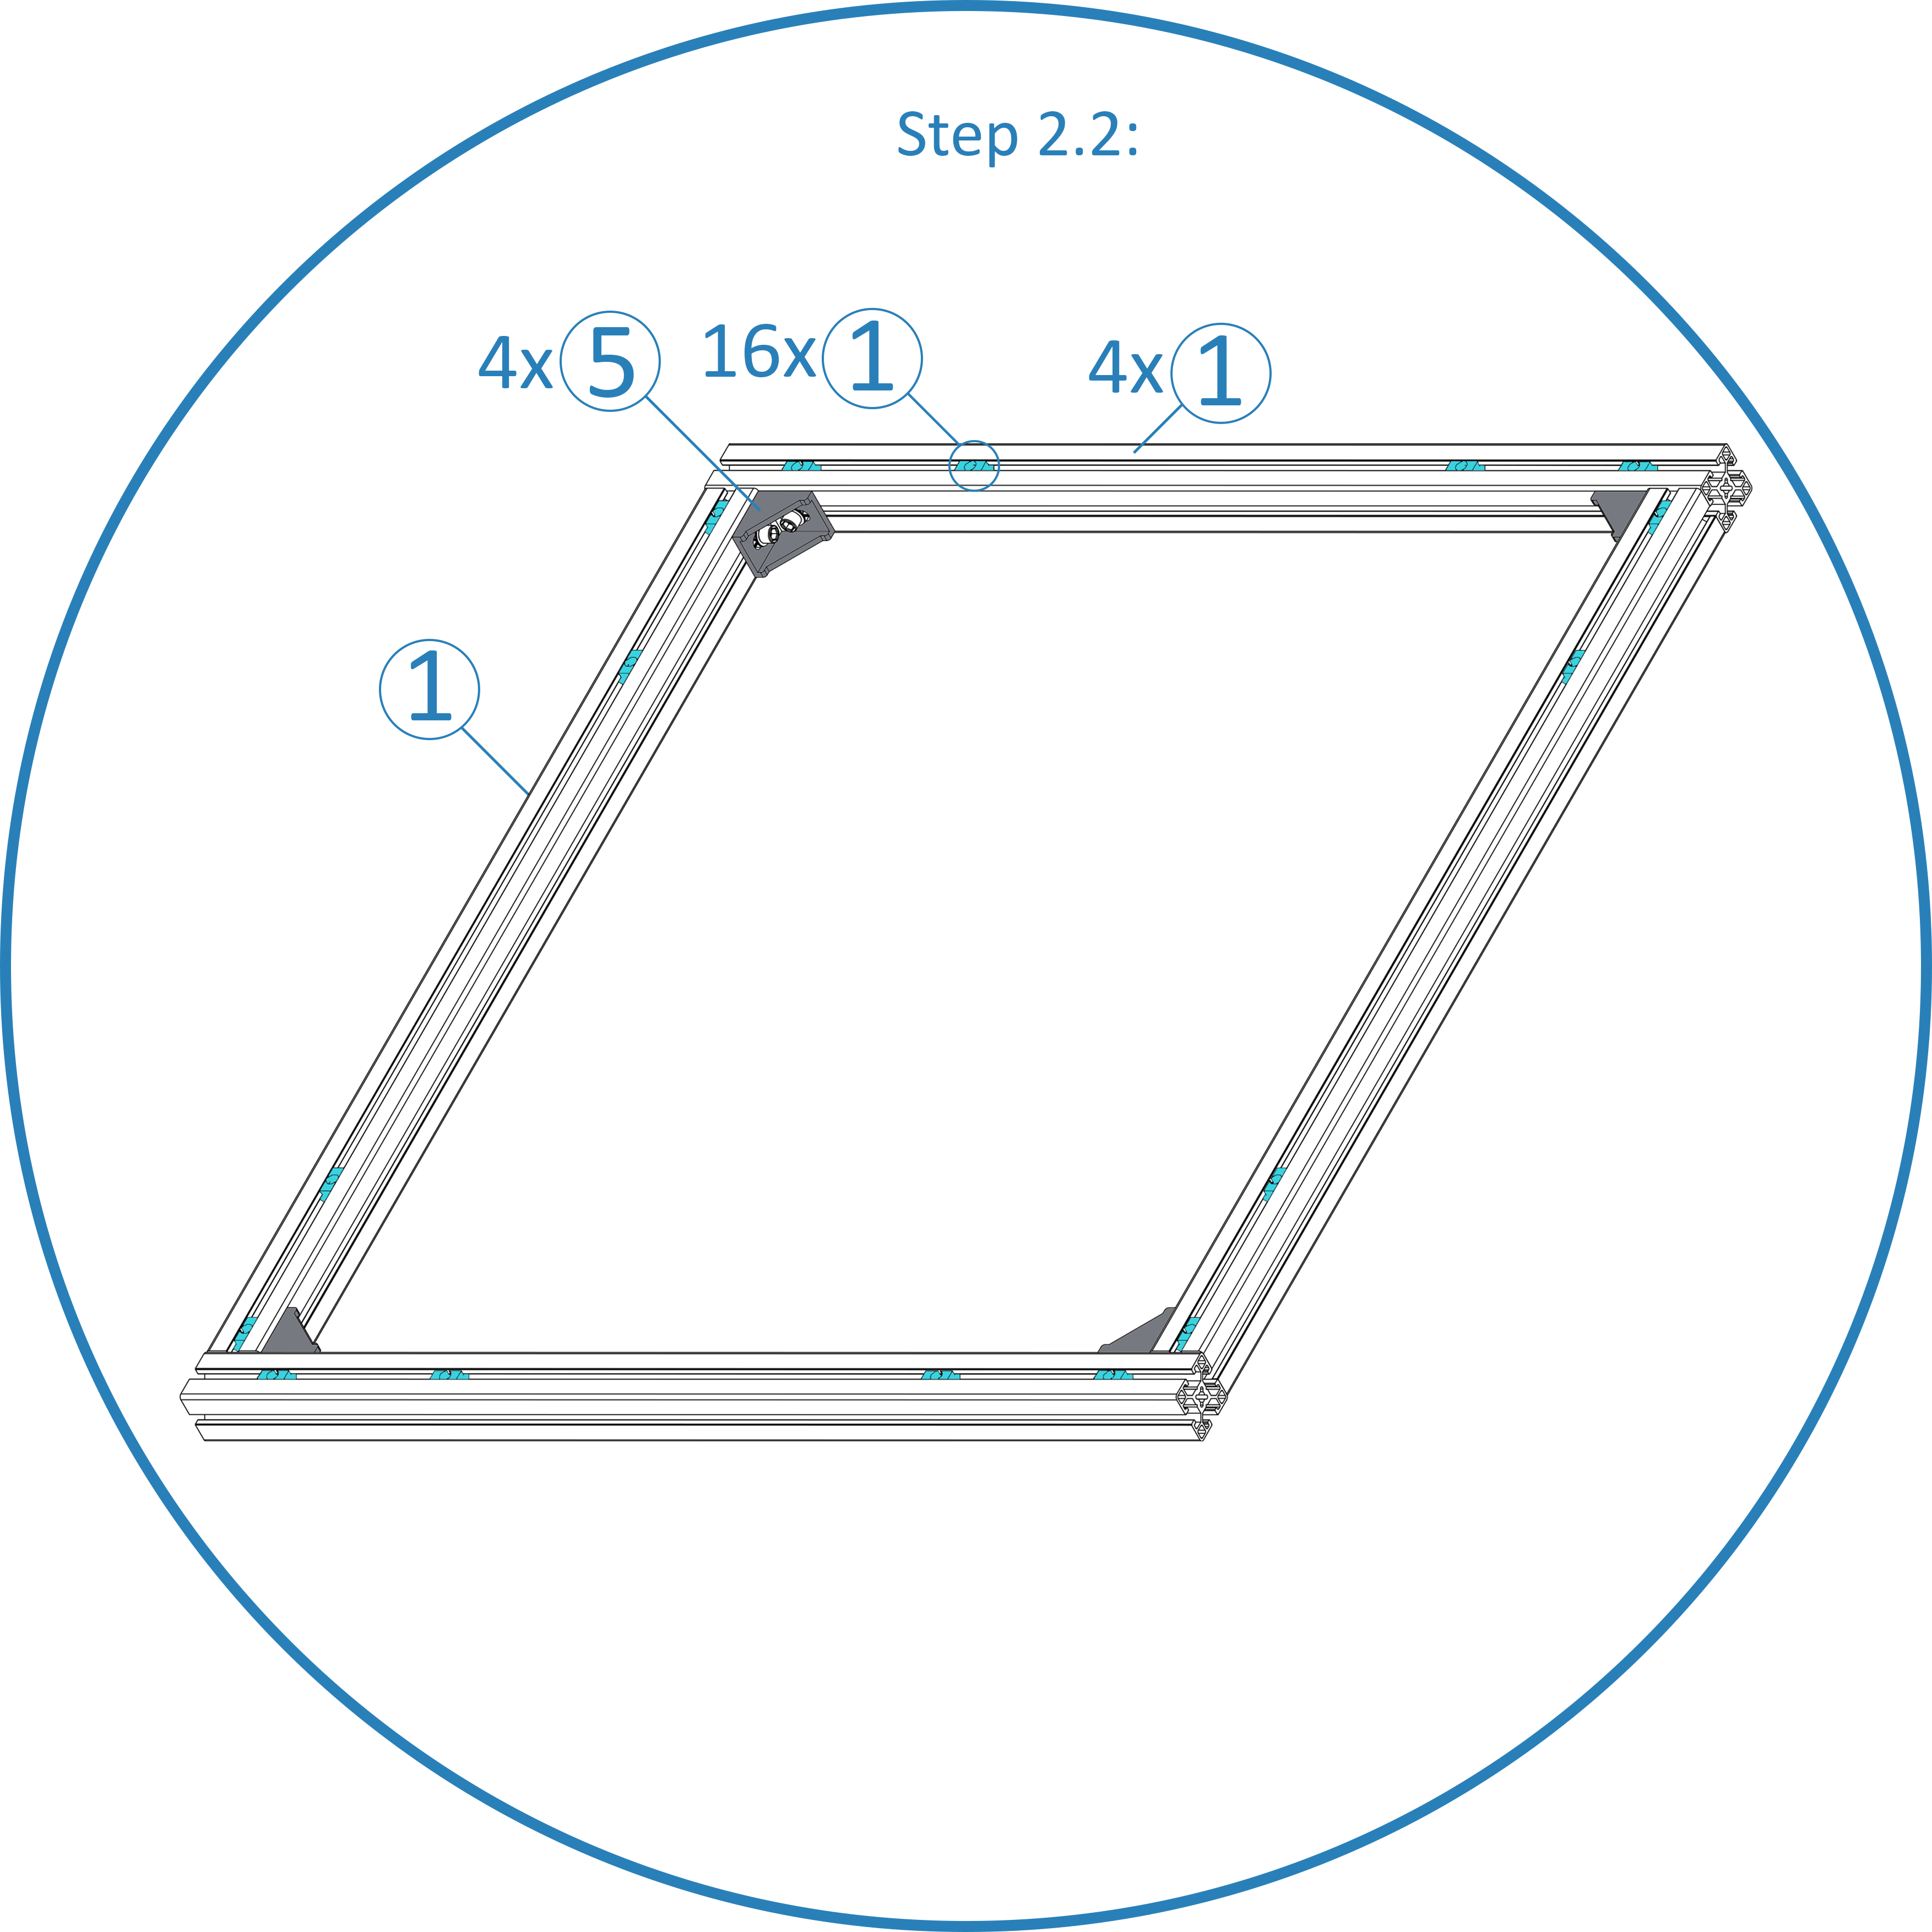
Then complete the rect by adding 2 remaining edges.
2.3 Adding 4 Support Columns to the Frame
-
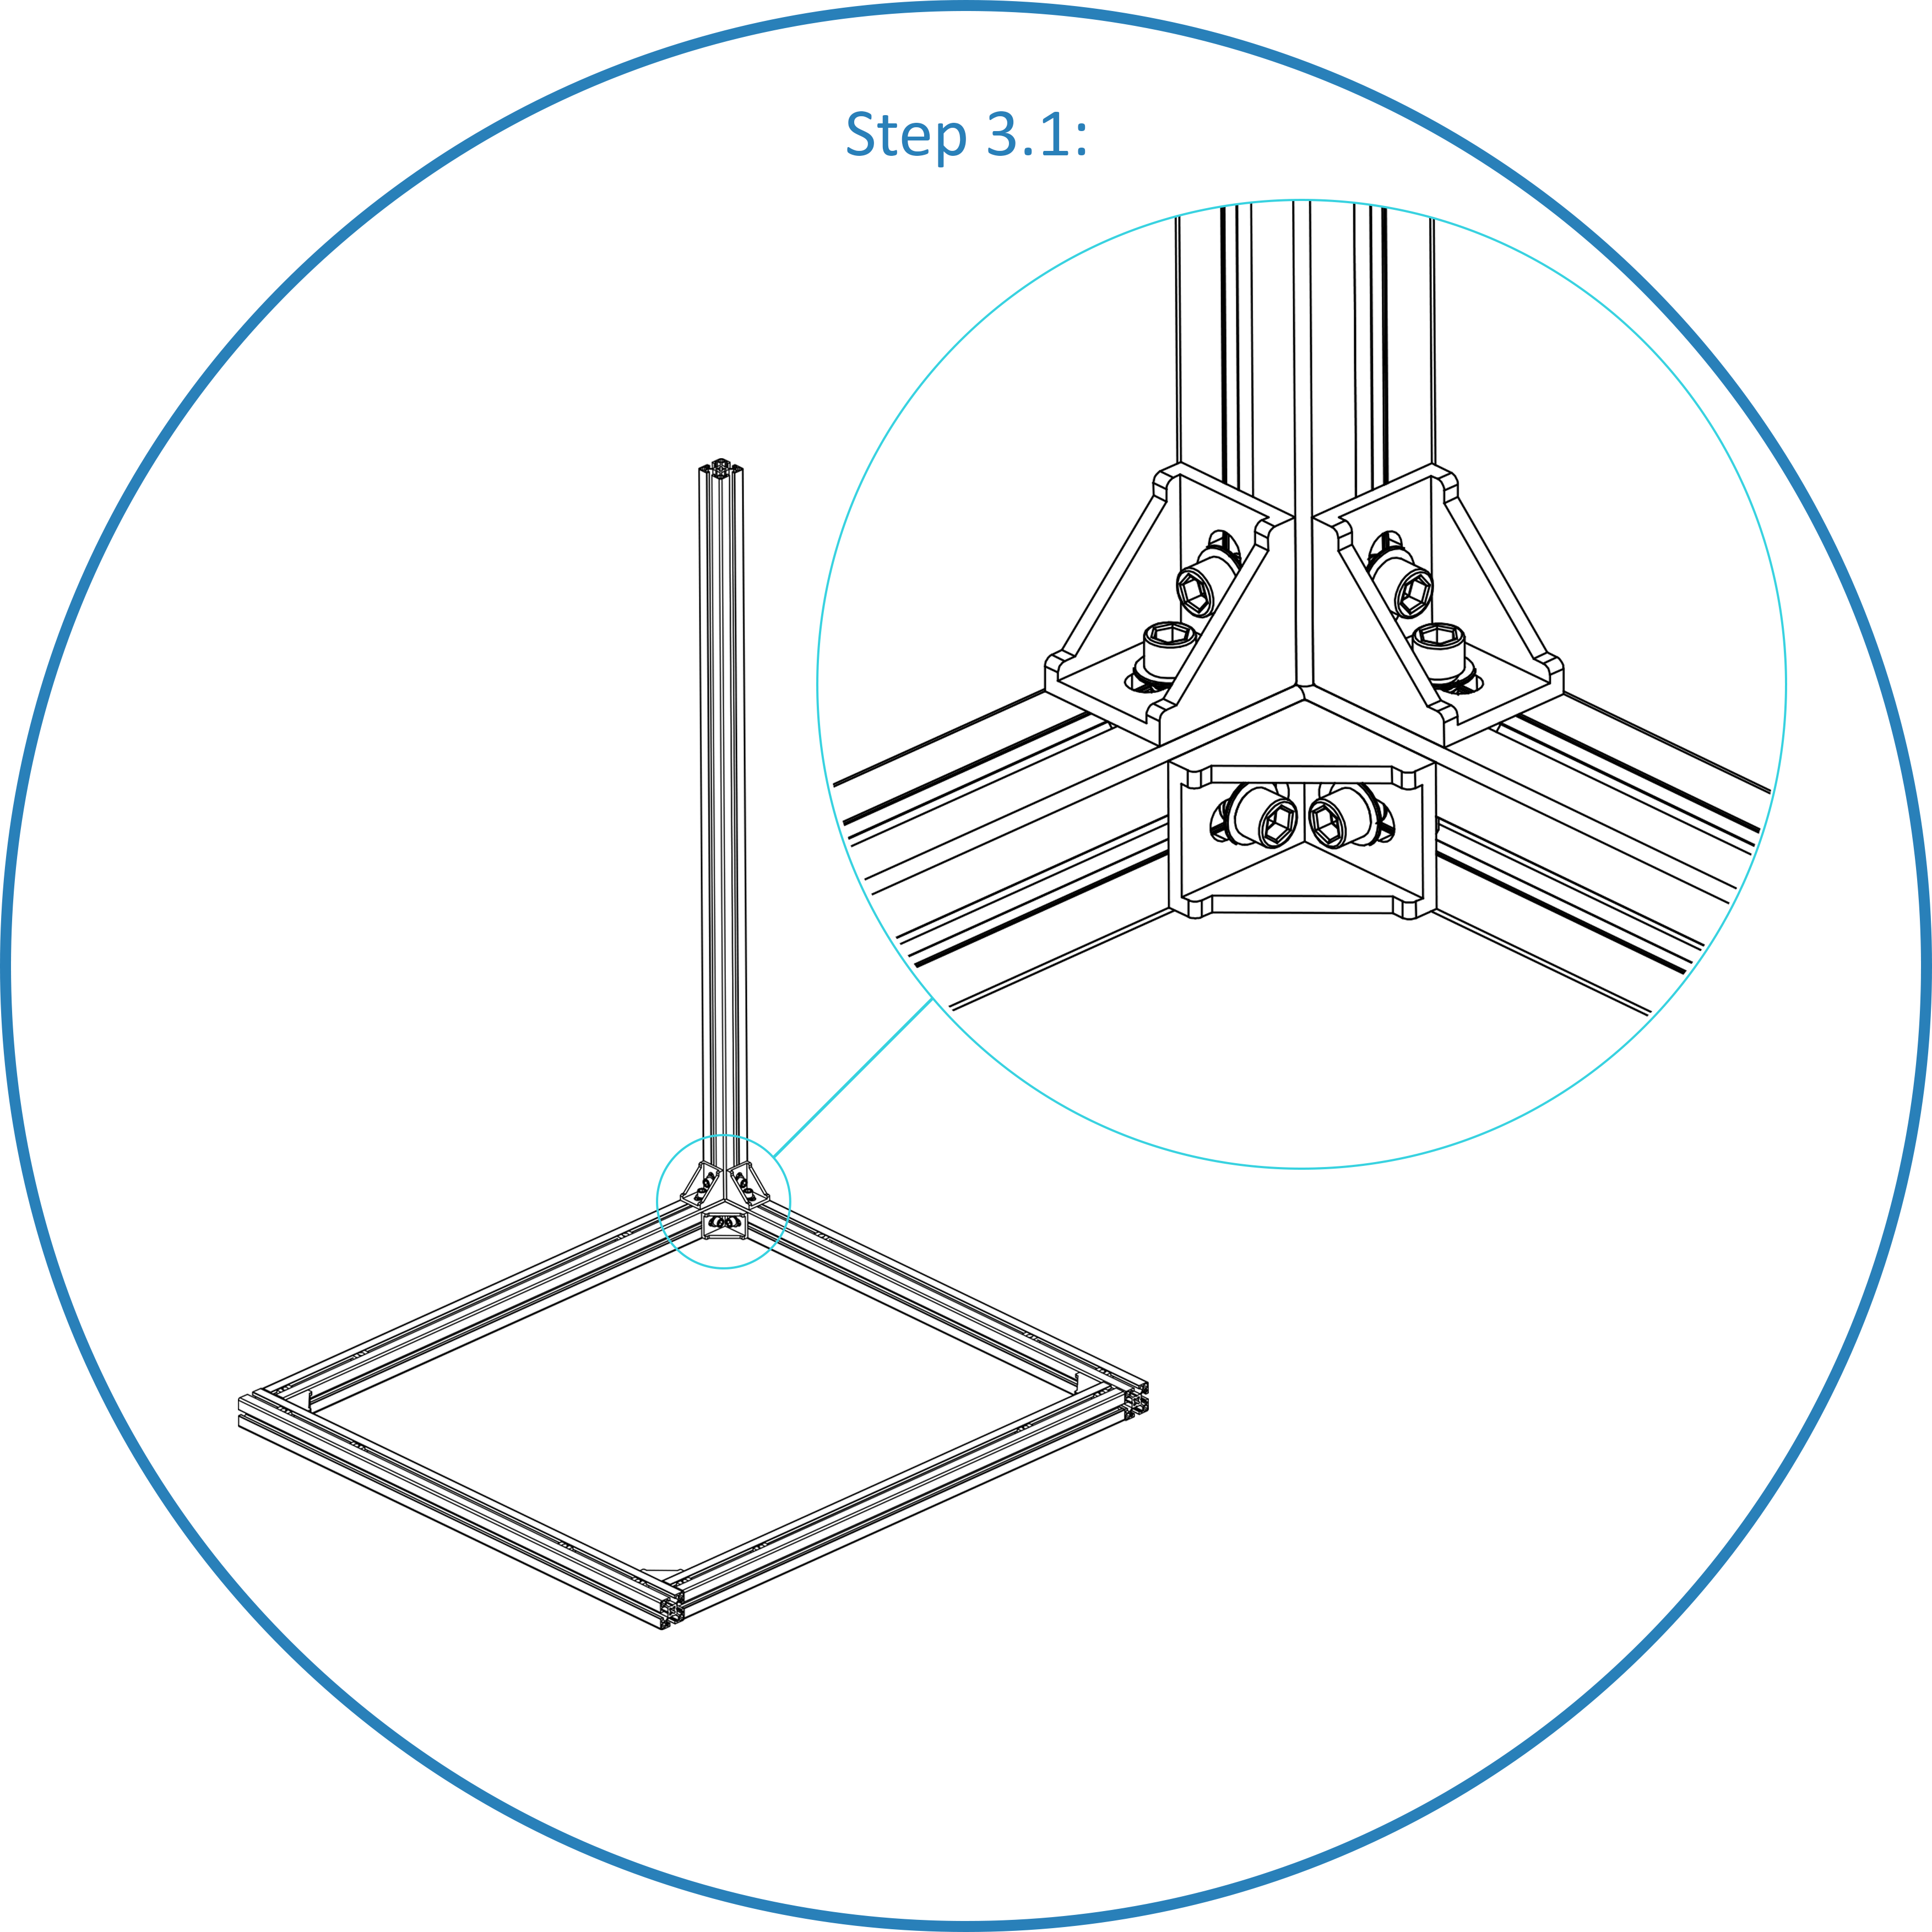
Position the first support column at its designated location near one corner of the frame.
-
Align the support column vertically and ensure it is plumb using a level or other suitable measuring tool.
-
Attach the support column to the frame using 2x 4040 Corner Brackets(5) on the 2 sides as the 2 edges of the rectangular frame below. Ensure a secure and stable connection.
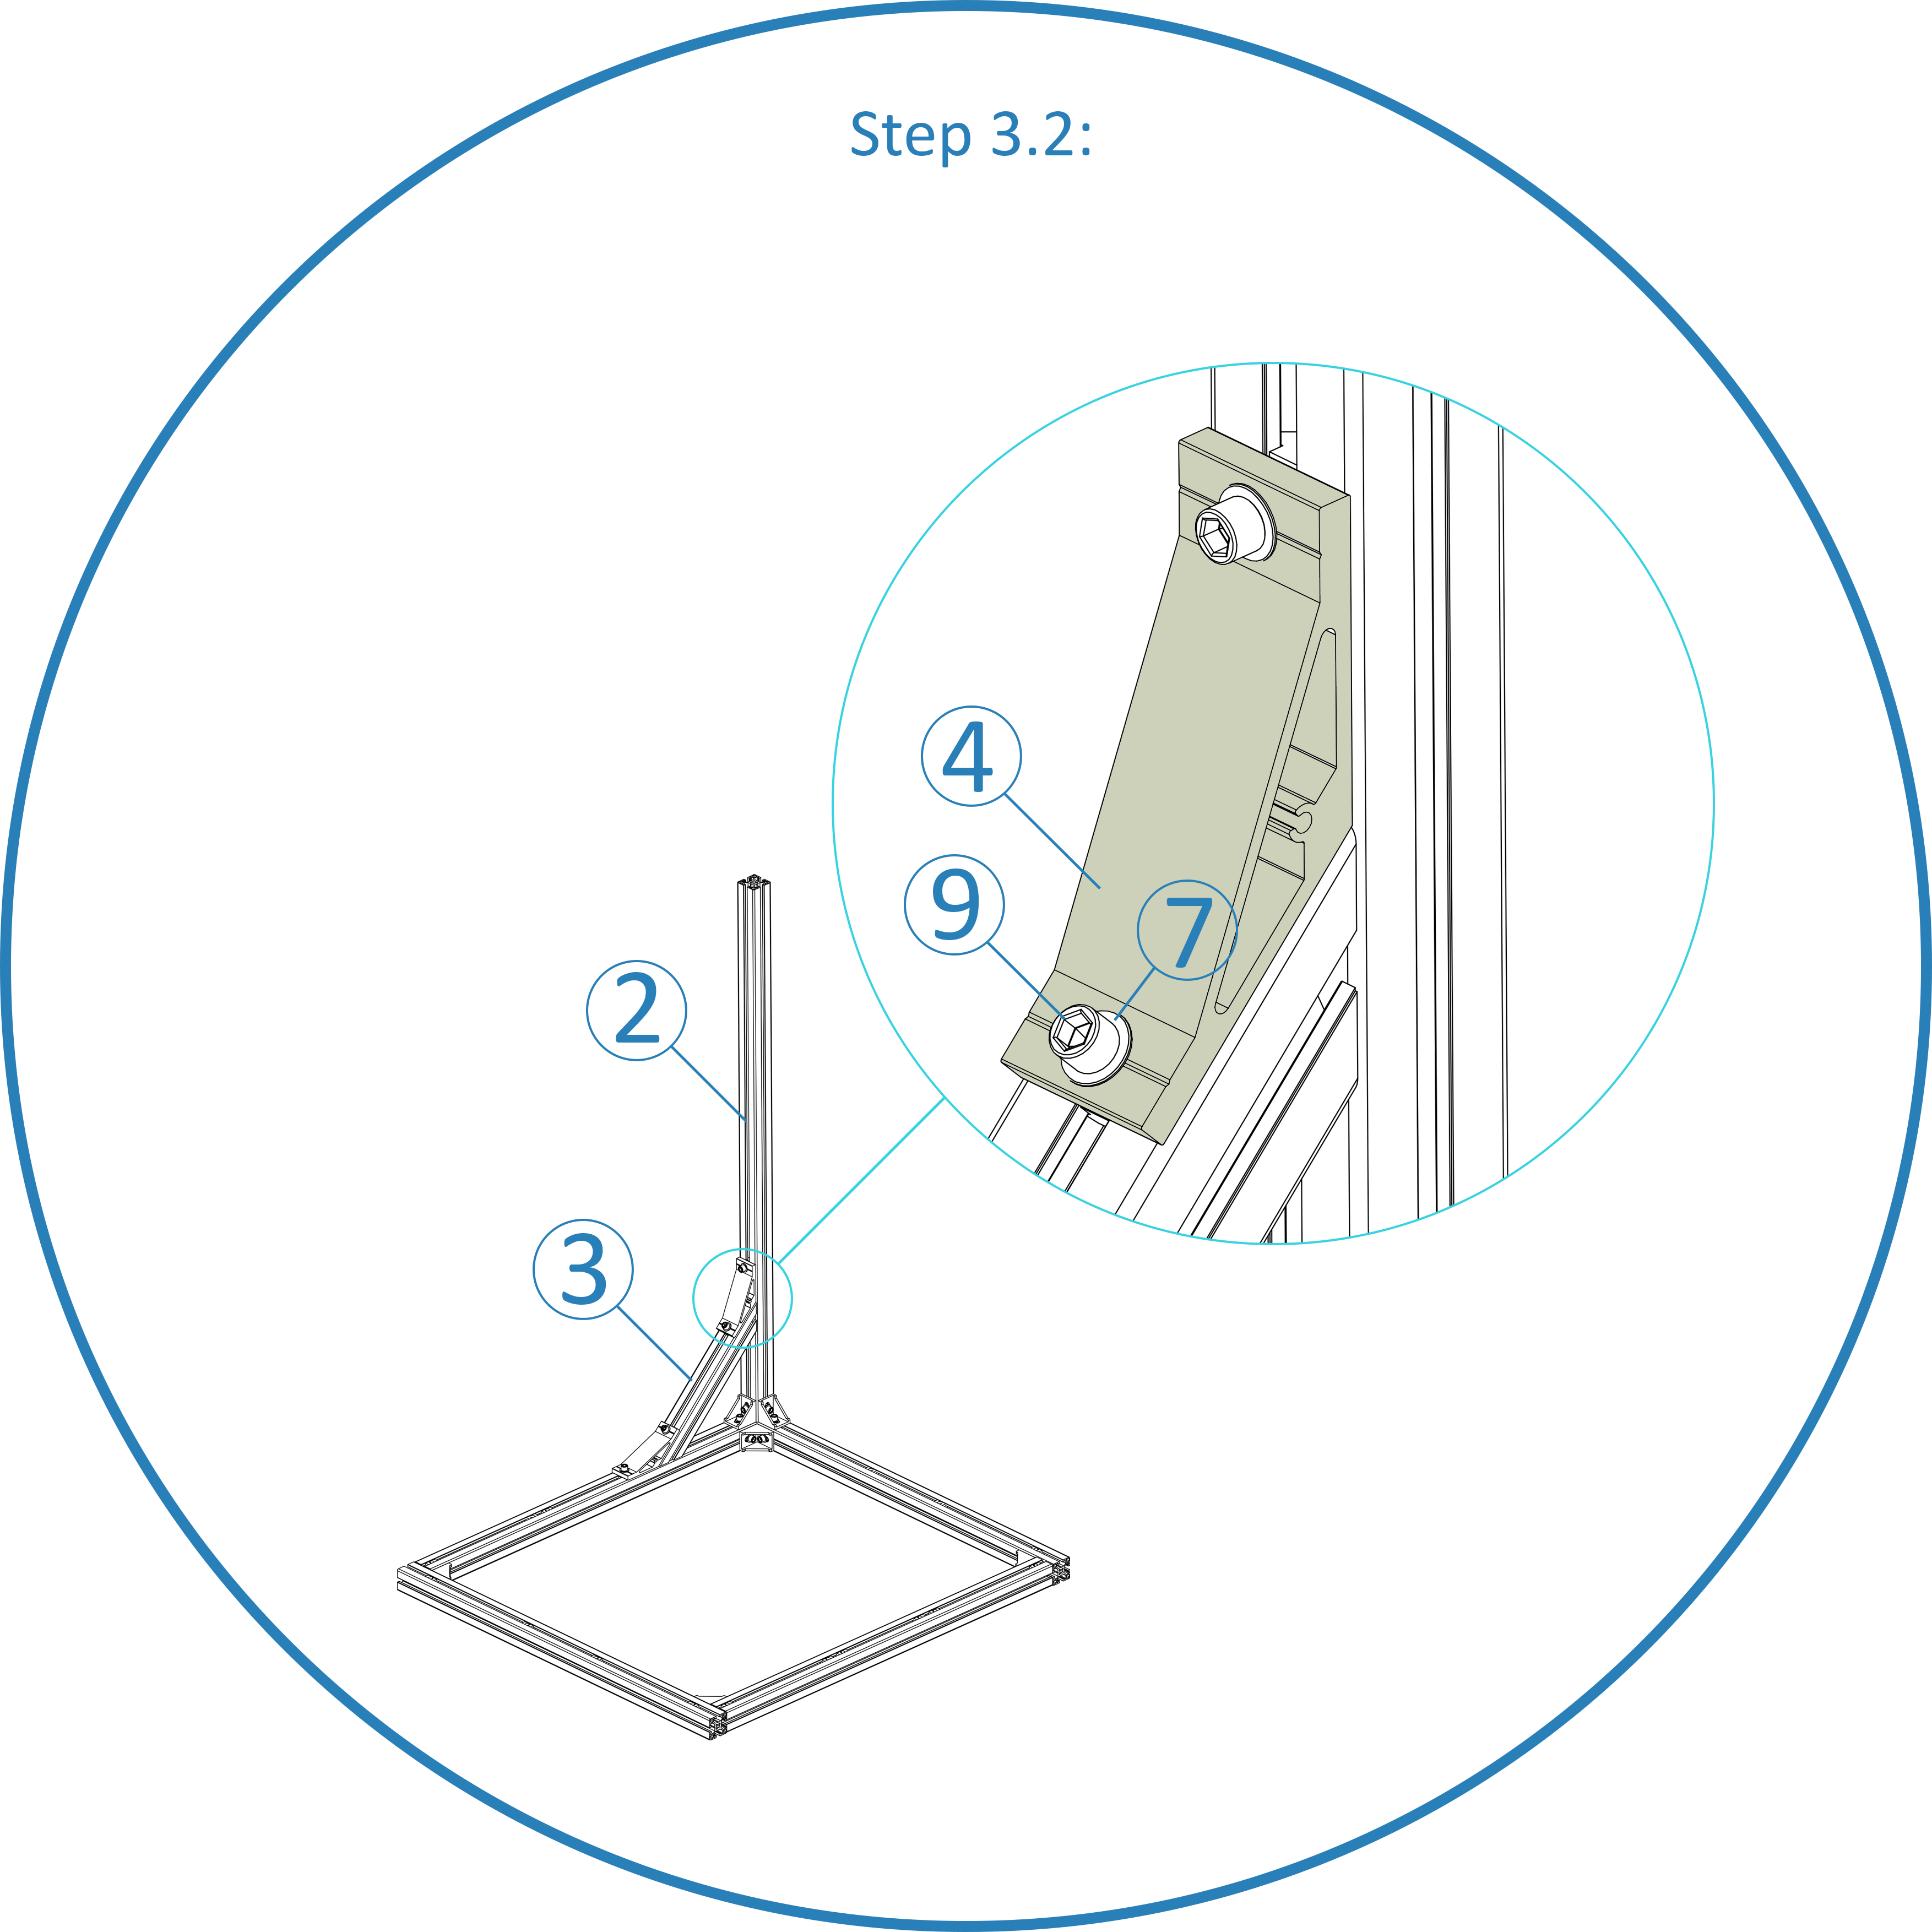
- Adding Diagonal Braces for Frame Reinforcement: use 4040 Angled Brackets 135deg (4) and Corner Alu(3) to create diagonal braces for the frame. This step uses M8x20mm Bolts(9), M8 Washer(7) and M8 T-nut(8).
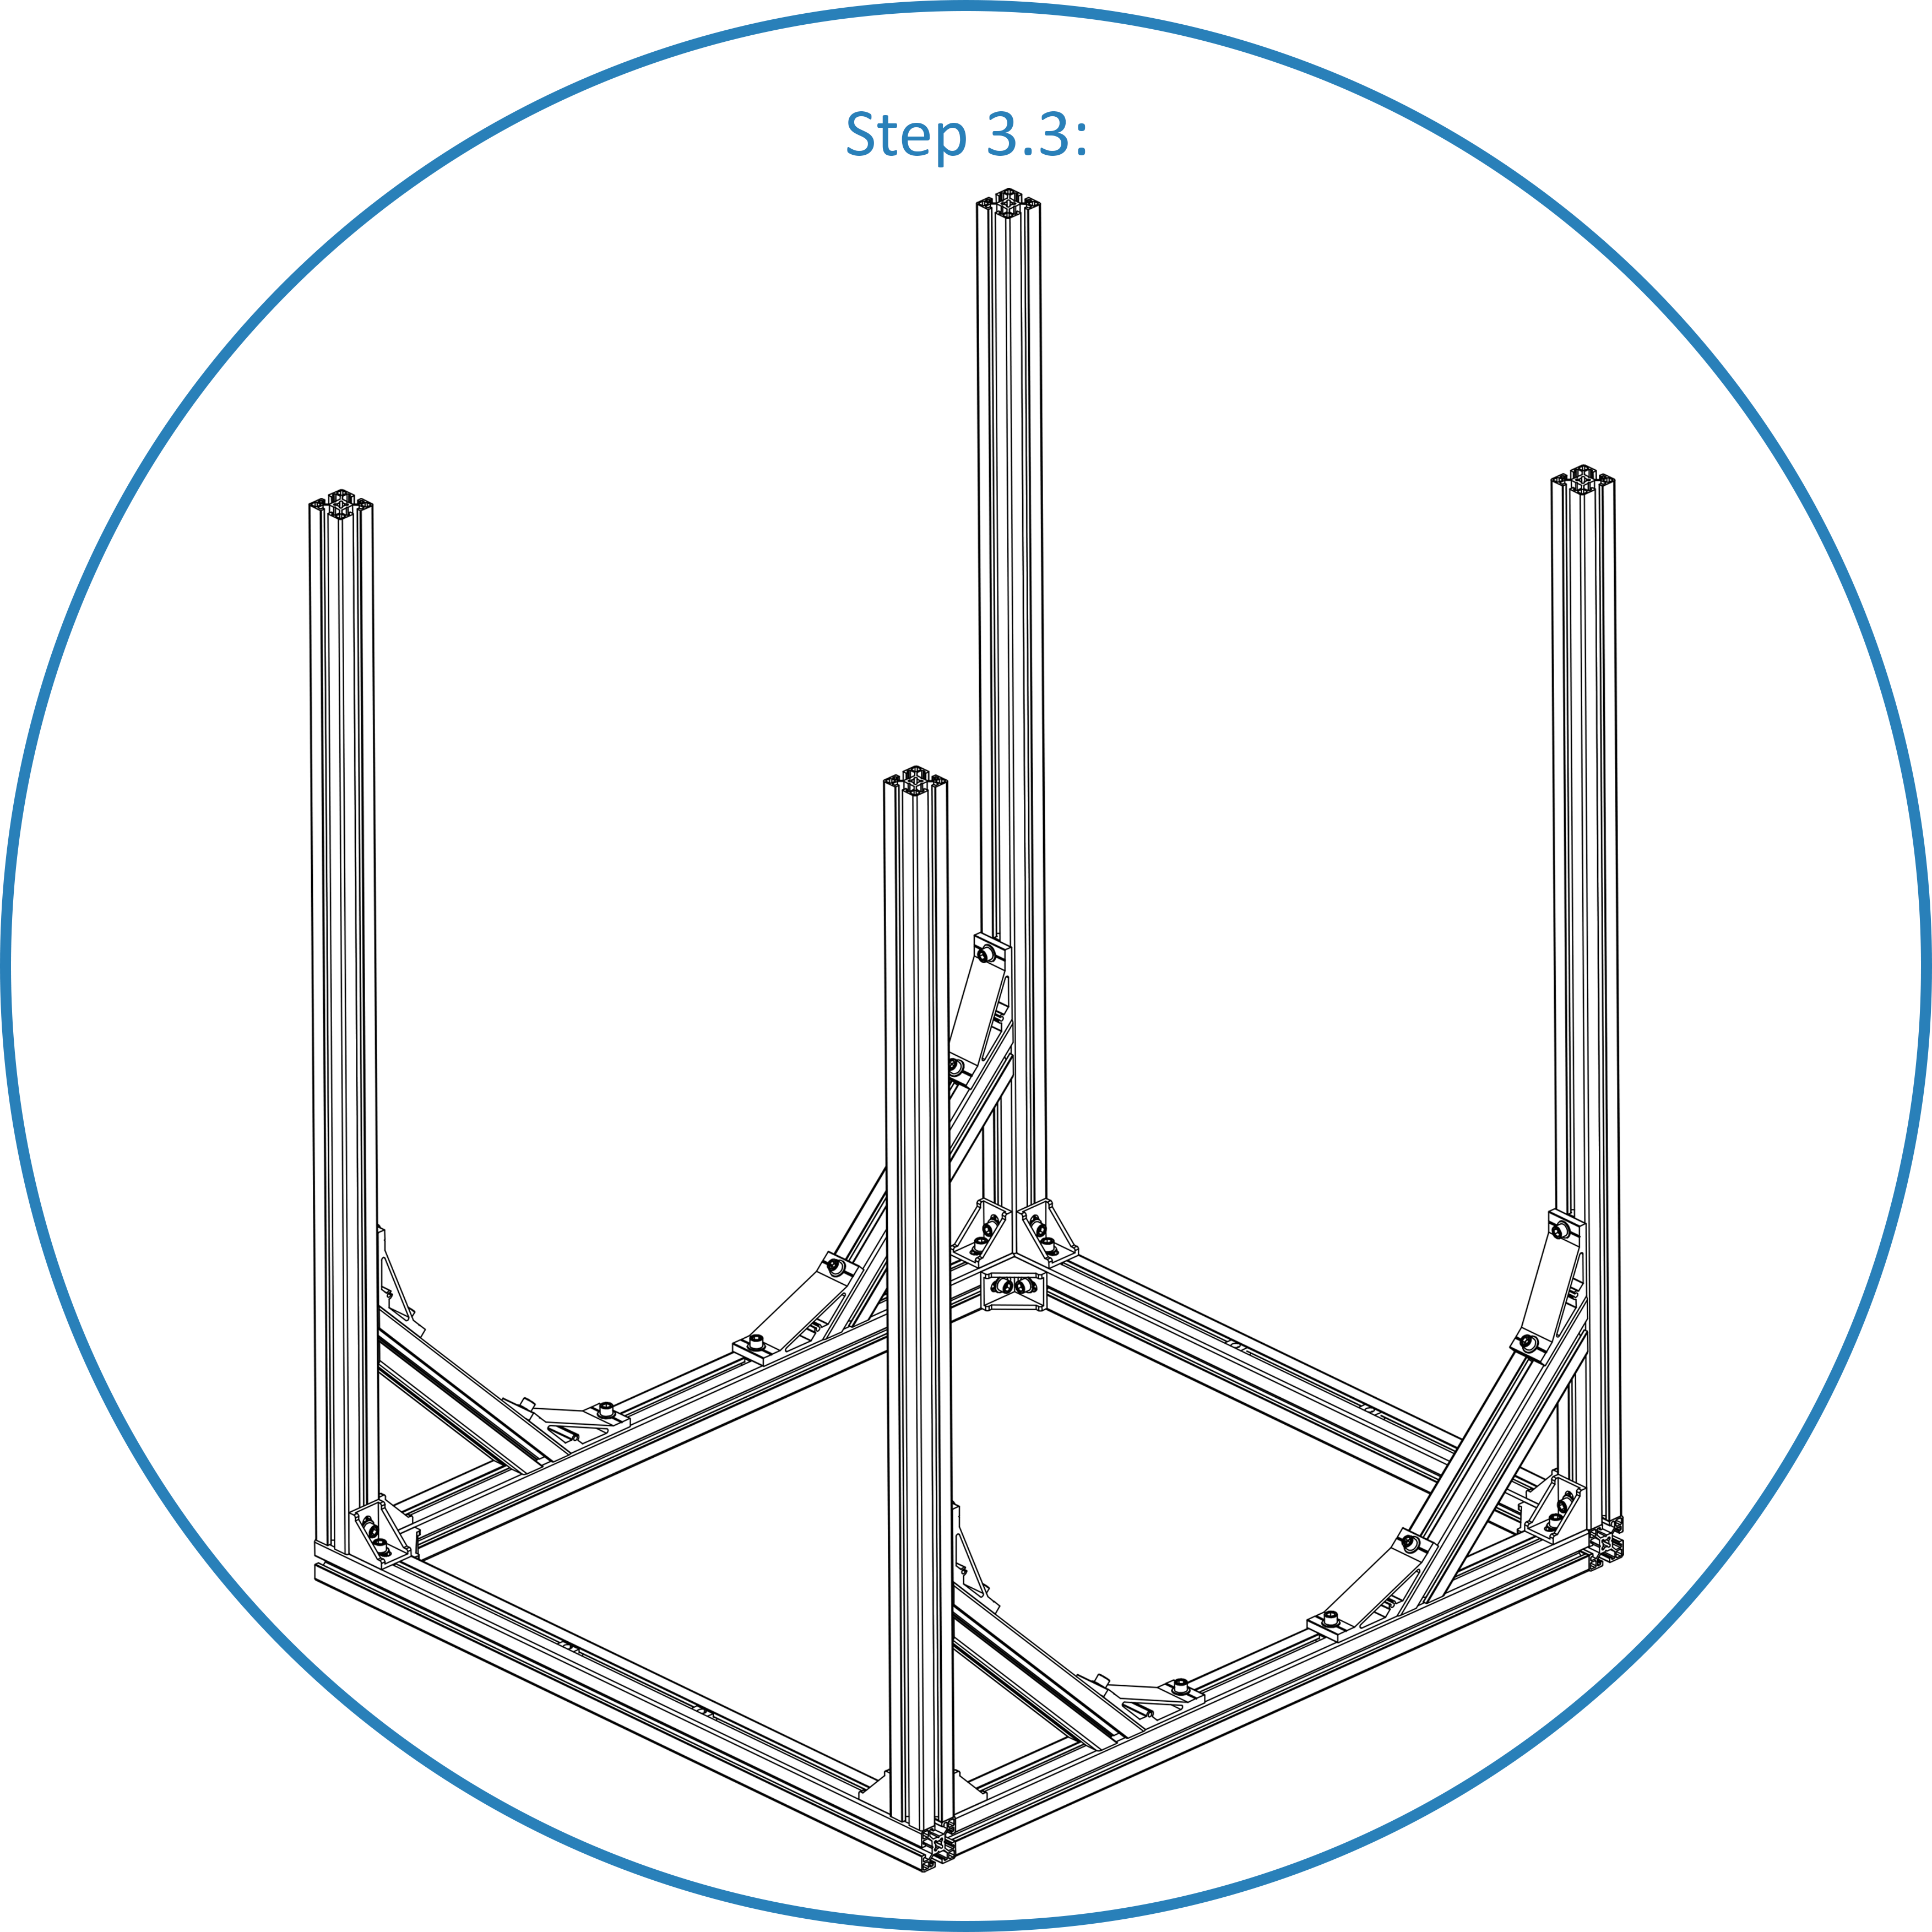
- Repeat these steps for the remaining 3 support columns, placing one near each corner of the frame and we got this one:
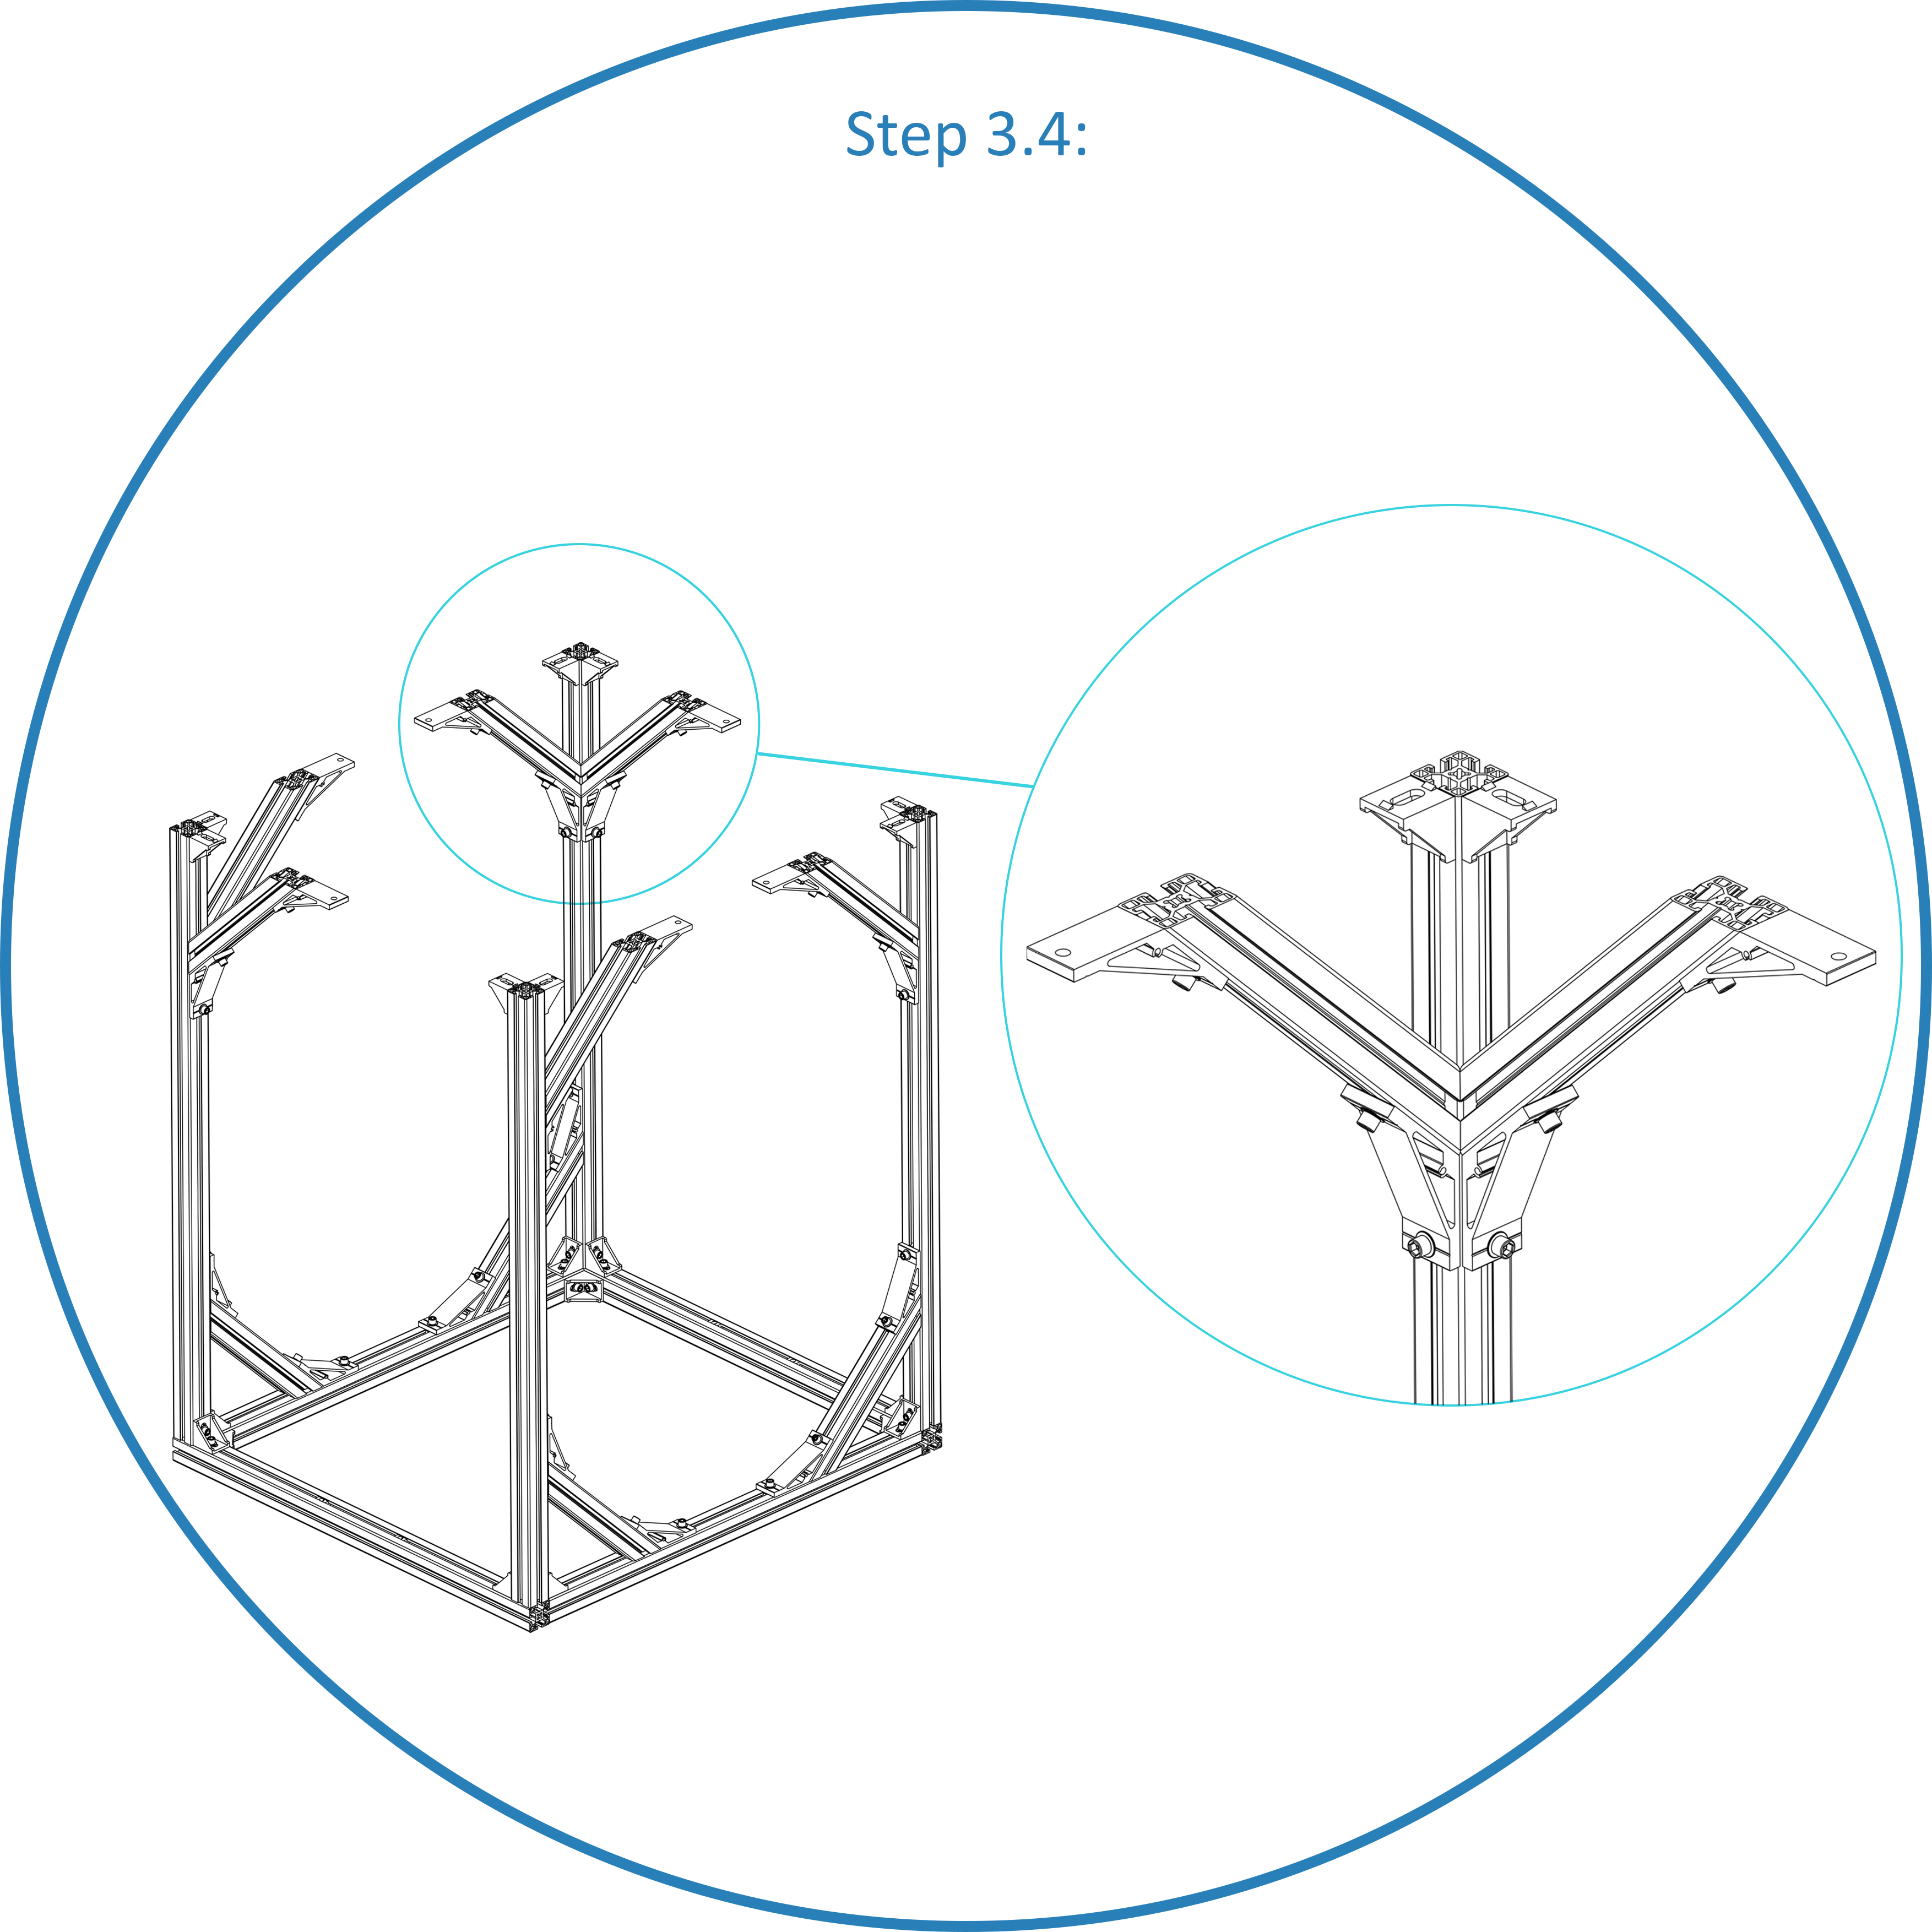
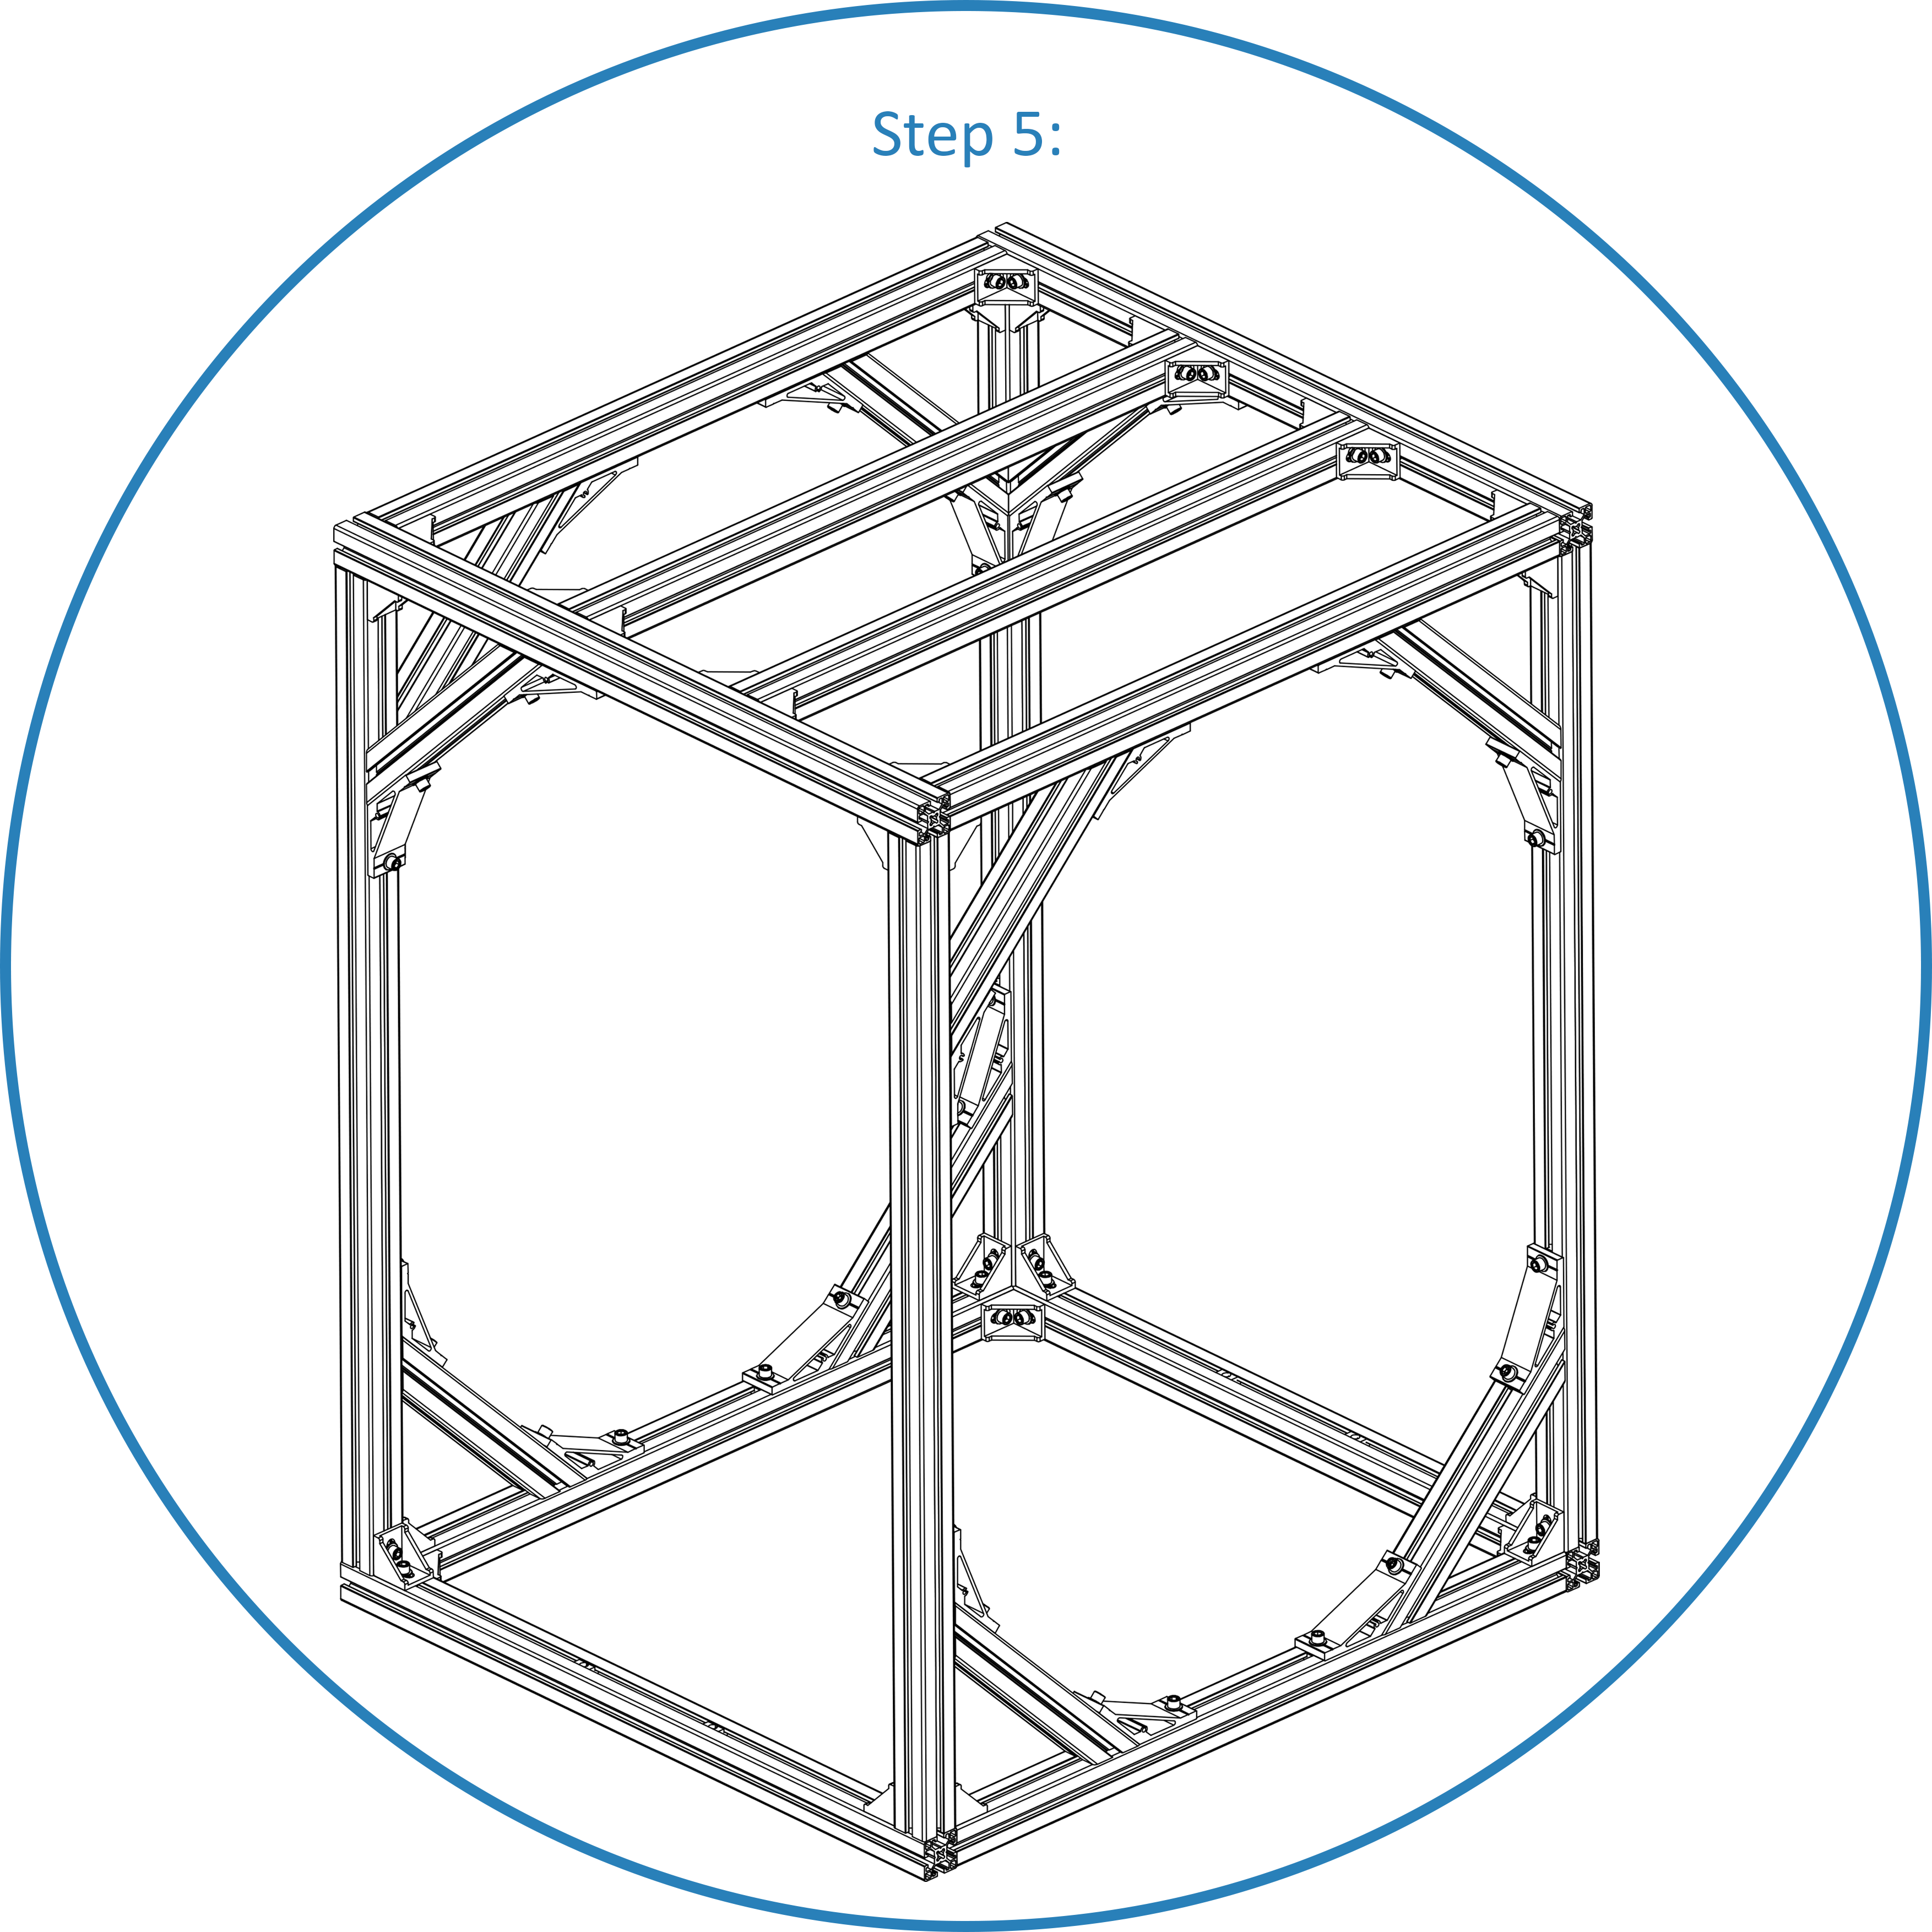
- Adding Top Diagonal Braces: as a part of frame reinforcement, we will add more some diagonal braces to the frame.
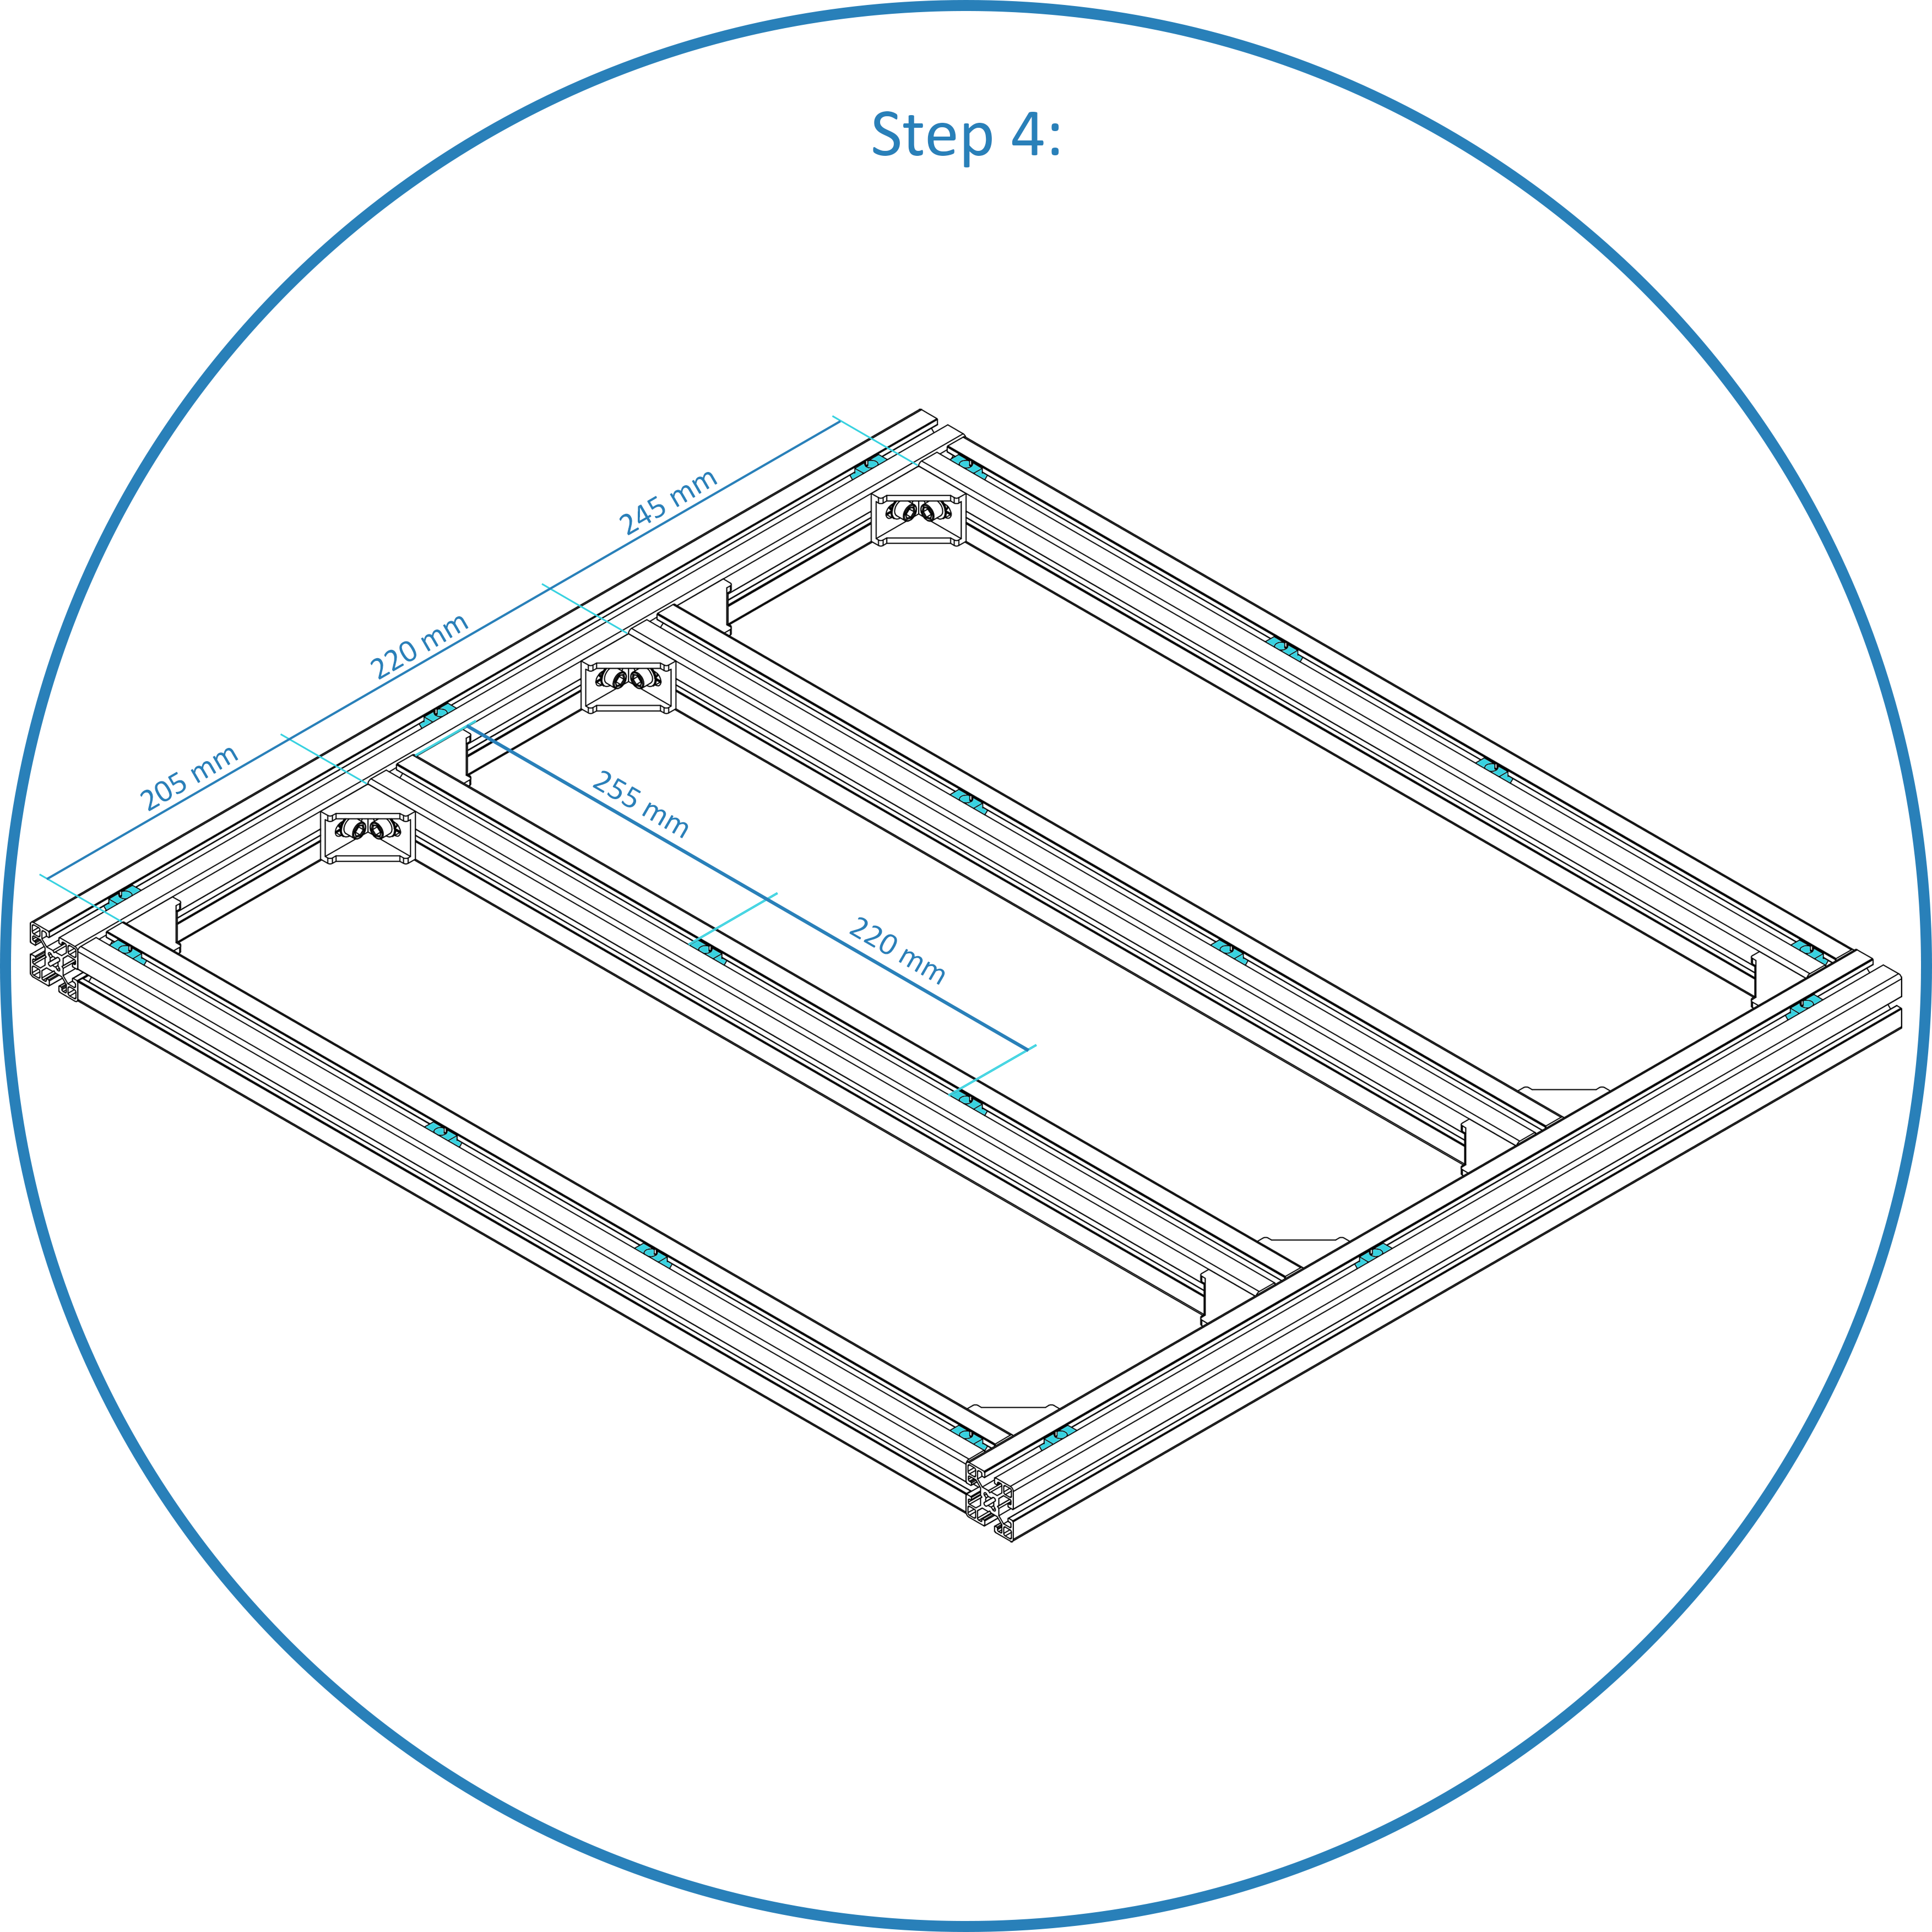
2.4 Create Top Rectangular Frame with Crossbars for Robot Mounting
- Create a rect frame like the rect below and then add 2 middle crossbars, follow these dimensions for model Delta X S D600 and Delta X S D800.
2.5 Install Top Rectangular Frame with the Main Frame Body
- Flip the Top Rectangular Frame, position the main frame body components within the rectangular frame, ensuring they fit securely.
- Adding Bolts and Washers and ensure a firm connection throughout the frame.
Step 3: Finalizing the Assembly
- Inspect the entire frame assembly to ensure all components are securely attached and aligned.
- Test the stability and structural integrity of the frame by applying gentle pressure or shaking. Make any necessary adjustments if there are signs of instability.
Contact Us
- Store: https://deltaxstore.com
- Website: https://www.deltaxrobot.com
- Email: deltaxrobot@gmail.com
- Phone: +84 38 875 2005