
Delta X 2 Robot Kit Assembly Guide
Welcome to the assembly guide for the Delta X 2 Robot Kit. Follow these step-by-step instructions to assemble your Delta X 2 robot with ease.
Table of Contents
Safety Precautions 
- Read all instructions carefully before assembly.
- Ensure a clean and well-ventilated workspace.
- Wear appropriate safety gear, including safety glasses and gloves.
- Keep all small parts away from children and pets.
- Use caution when working with power tools or sharp objects.
Package Contents 
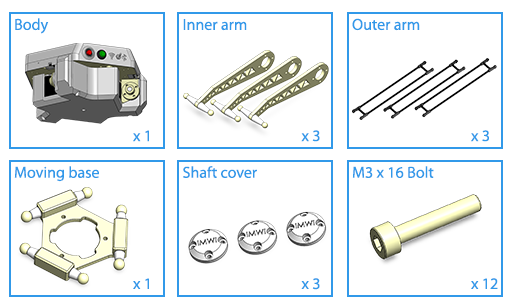
Tools Required 
- M2.5 Hex Key Wrench.
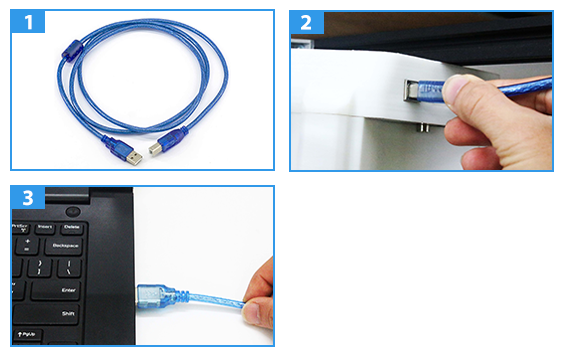
- USB-B cable.
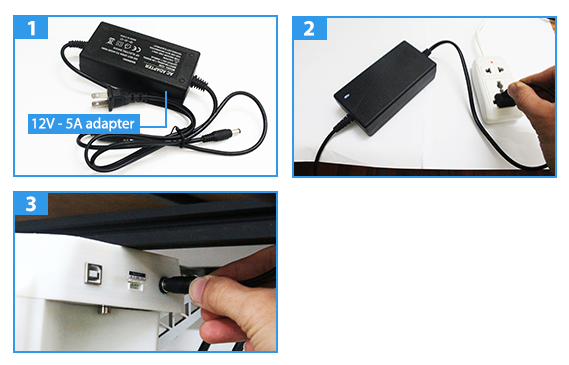
- Power Supply 12VDC/5A
Assembly Tutorials 
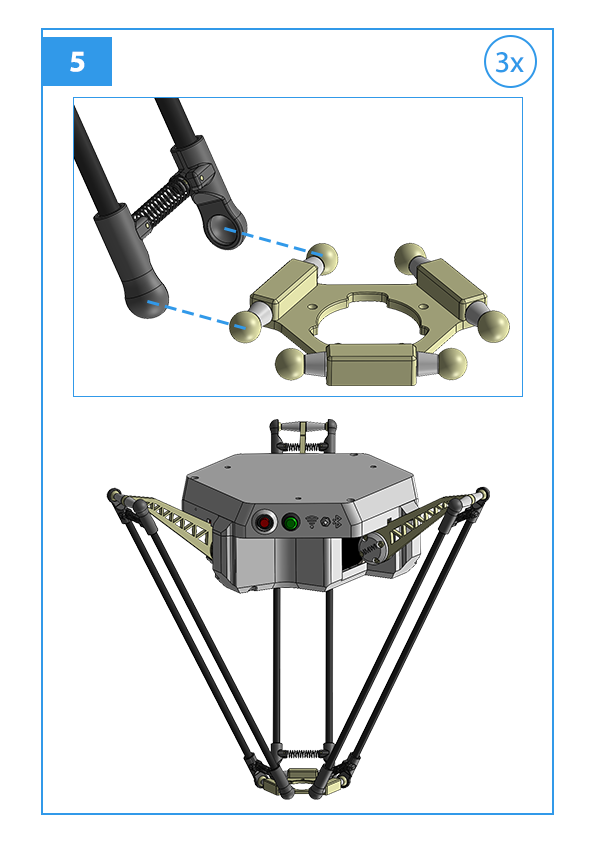
Step 1: Robot Assembly 

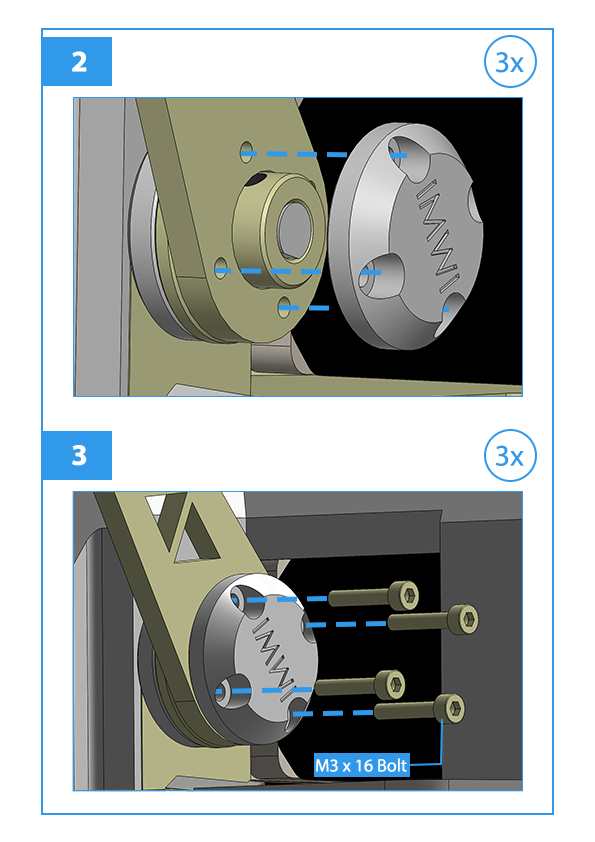

Step 2: Aluminum Frame Assembly 
2.1. Pick and Place Frame Part List
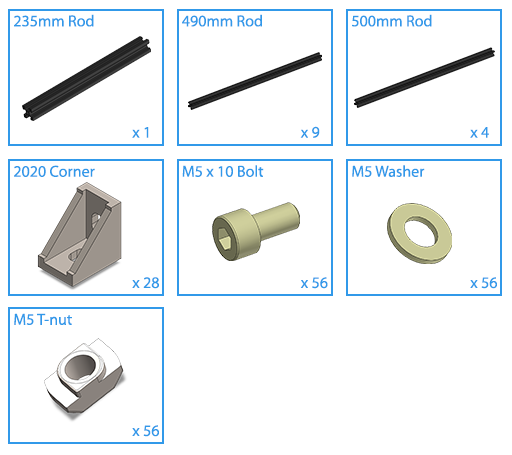
2.2 Pick and Place Frame Assembly
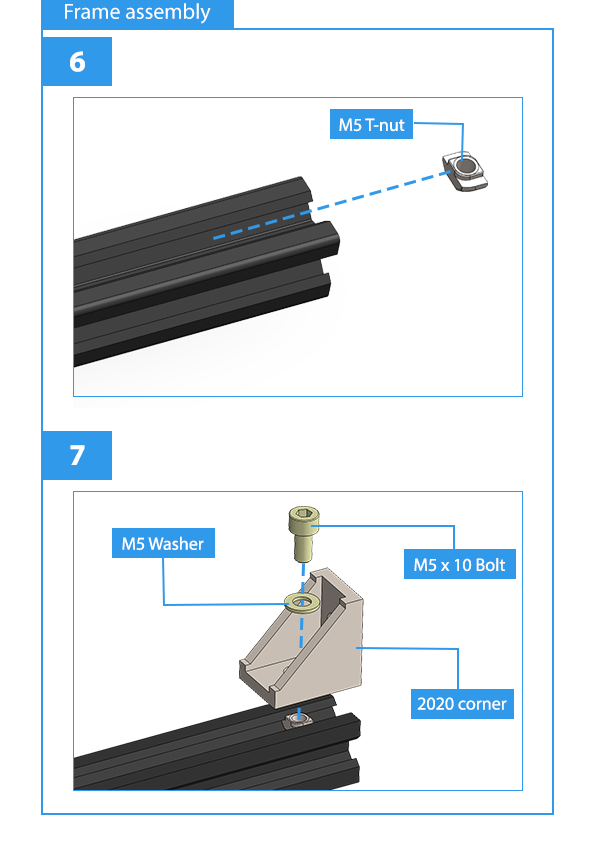
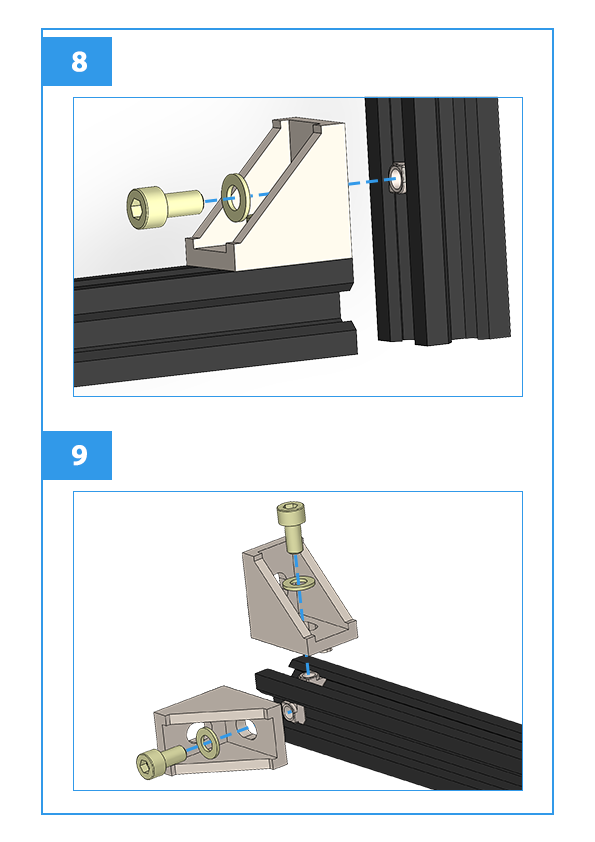
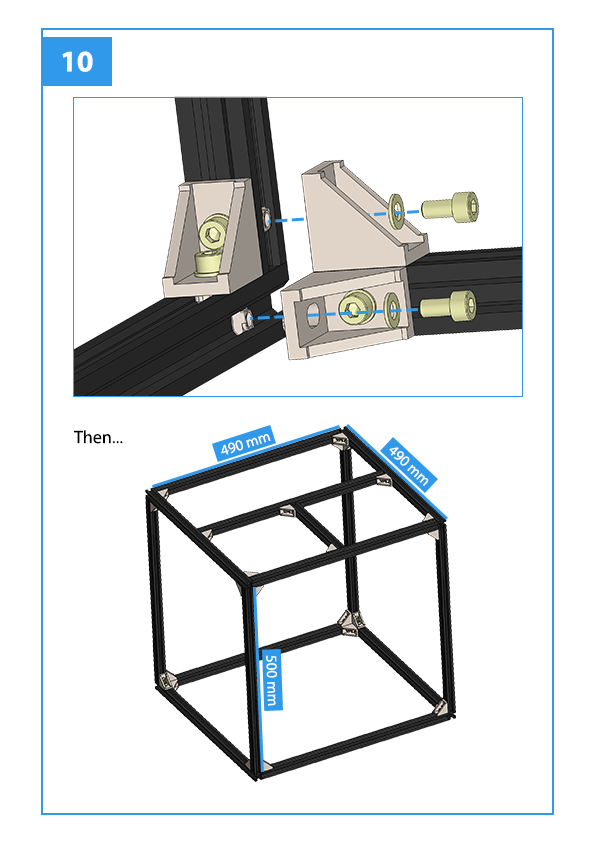
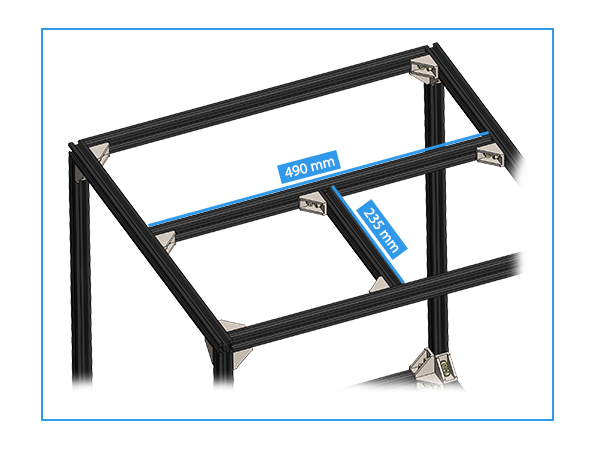
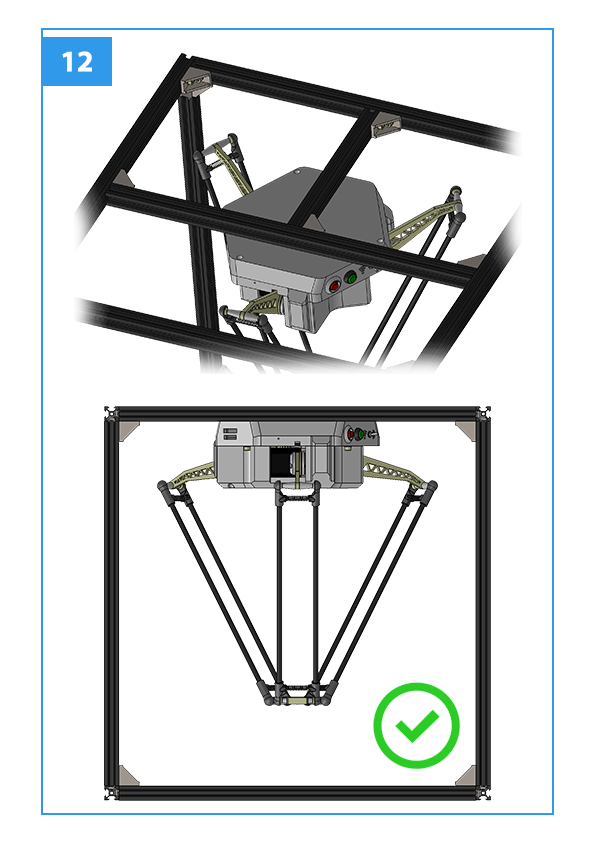
2.3 Install Robot Into The Aluminum Frame
Frame Accessories
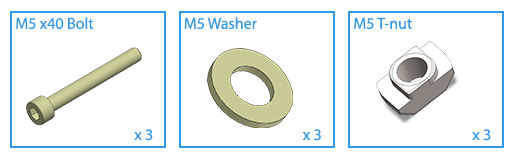
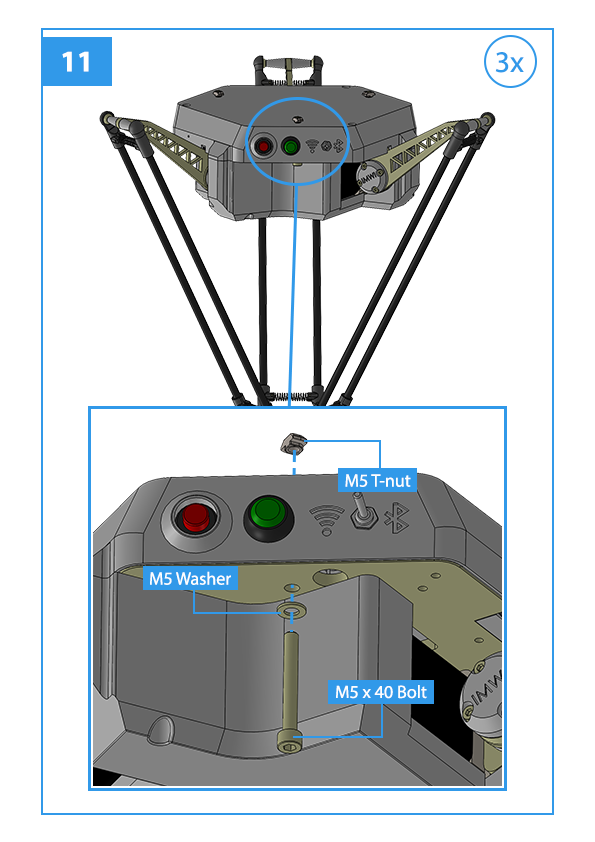
Install Robot Body
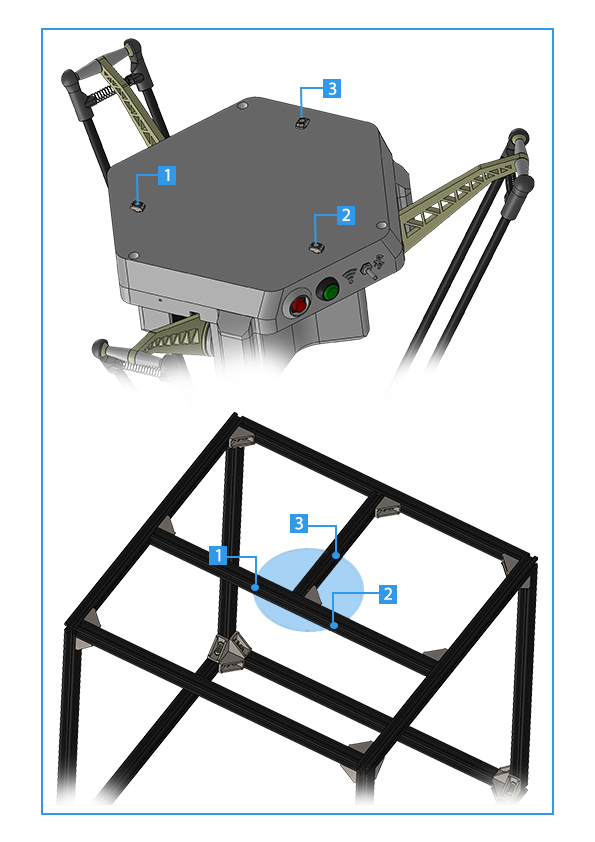
Step 3: End Effector Attachment 
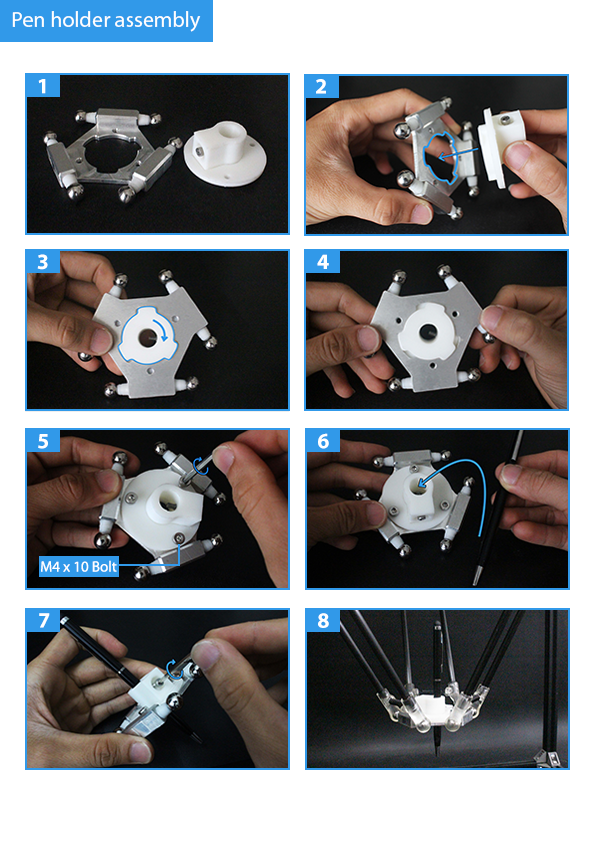
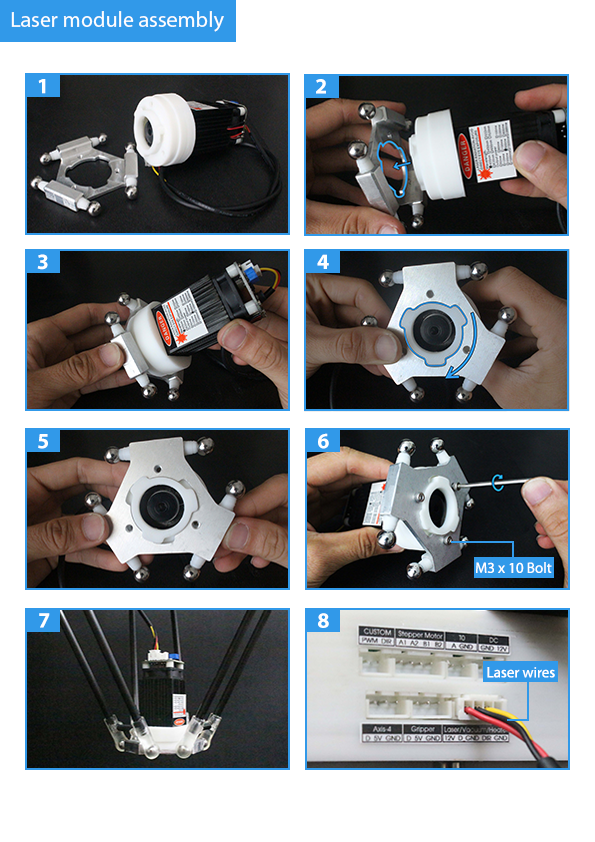
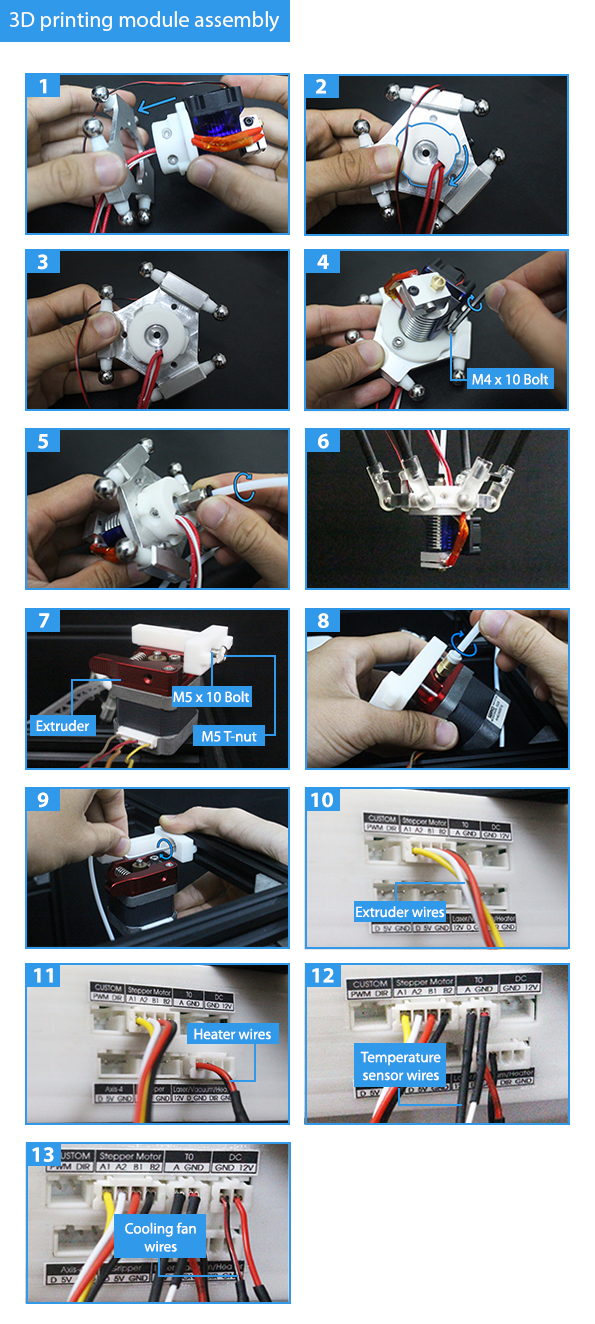
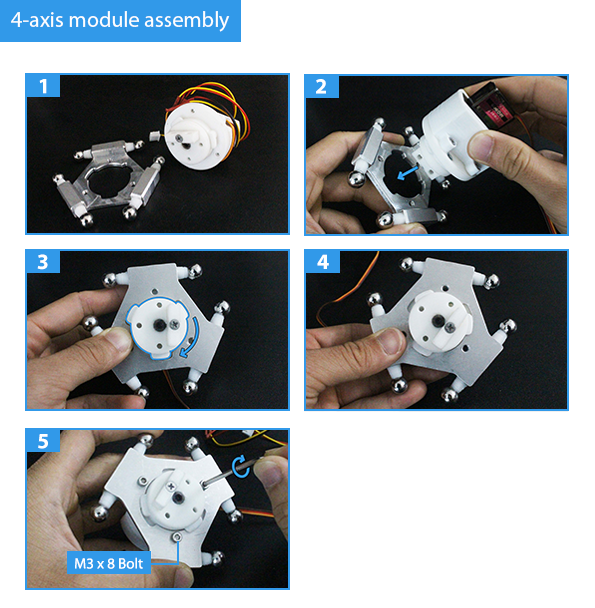
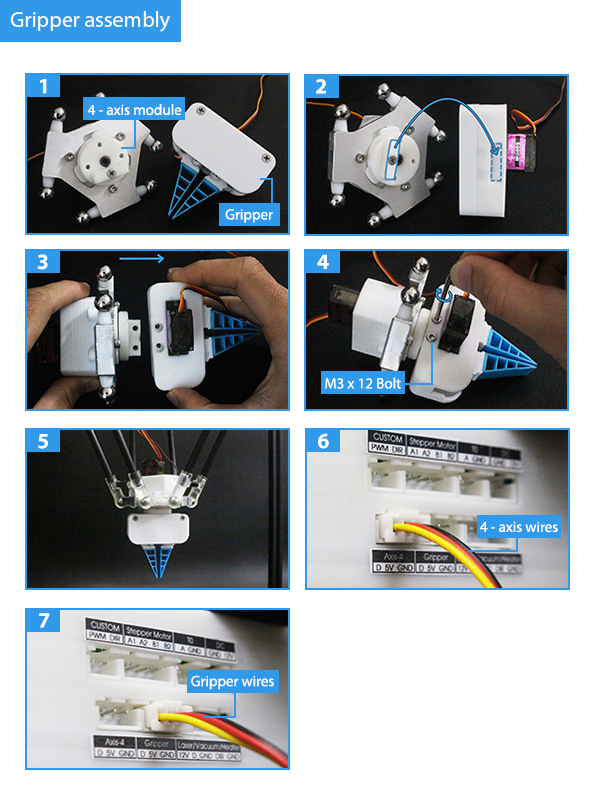
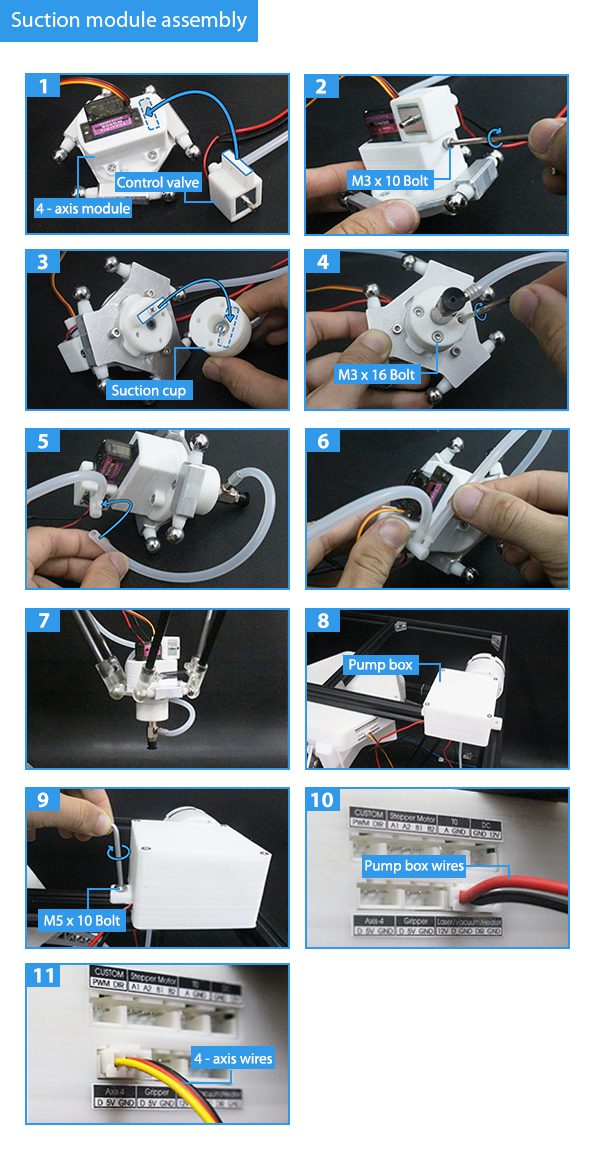
Step 4: Power on and Testing 
4.1. Power on the robot
4.2. Connect the robot with computer
4.3 Download Delta X Software HERE
Note
You may want to install CH340 Driver before launch the software. It’s necessary for communication between robot and computer. Download driver HERE
After installing Delta X Software and CH340 Driver, launch the software, click the Connect button to establish a connection with the robot. If the button changes to Disconnect, it means the robot is successfully connected. Then, press the Home button to return the robot to its home position.
Maintenance 
Proper maintenance is crucial for keeping your Delta Robot in optimal working condition. Follow these guidelines to ensure the longevity and performance of your robot:
- Keep the robot away from water and other liquids.
- Keep the robot and its components clean by wiping down surfaces with a soft, dry cloth.
- Power off the robot when not in use for an extended period.
- Periodically inspect and tighten all bolts, nuts, and connectors to prevent loosening due to vibrations or movements.
Contact Support 
- Store: https://deltaxstore.com
- Website: https://www.deltaxrobot.com
- Email: deltaxrobot@gmail.com
- Phone: +84 38 875 2005